SHARE Knowledge Hub
Hazardous Substances, Anatomy and Routes of Exposure
Hazardous substances harm the body through routes of exposure: inhalation into the lungs, skin and eye contact, absorption through the skin, ingestion, injection and sometimes transfer from contaminated surfaces. The health effect depends on the substance, physical form, dose, duration, frequency, target organ, individual susceptibility and whether the effect is acute, chronic, local or systemic. Good COSHH decisions start by understanding how the substance reaches the body, because the right controls for vapour inhalation are not the same as controls for skin absorption, dust ingestion or eye splash.
Understanding Hazardous Substances, Anatomy and Routes of Exposure
Hazardous substances harm the body through routes of exposure: inhalation into the lungs, skin and eye contact, absorption through the skin, ingestion, injection and sometimes transfer from contaminated surfaces. The health effect depends on the substance, physical form, dose, duration, frequency, target organ, individual susceptibility and whether the effect is acute, chronic, local or systemic. Good COSHH decisions start by understanding how the substance reaches the body, because the right controls for vapour inhalation are not the same as controls for skin absorption, dust ingestion or eye splash.
Why this matters at work
Skin exposure can cause local damage without systemic uptake, or a chemical can pass through skin into the body. Irritants damage the skin barrier directly; allergens can sensitise a person so later contact causes allergic dermatitis. Prolonged wet work, oils, detergents and repeated washing can weaken skin even where no dramatic splash occurs. Absorption through skin depends on the agent, formulation, contact area, duration, skin condition and contamination under clothing or gloves. A low air result cannot exclude it.
For each credible source, describe release, transport, contact, entry and effect. Distinguish inhalation, direct skin/eye injury, skin absorption, ingestion and puncture. Estimate level, duration and frequency using available evidence; note uncertainty. Check whether exposure is already prevented, what remains, and whether an applicable WEL or specific biological guidance is relevant. A WEL comparison answers only a properly sampled air-exposure question. Use competent hygiene, engineering and occupational-health advice where the decision is complex or high consequence.
How organisations manage this in practice
Trace where contamination is transferred during handling, glove removal, breaks and cleaning, including shared controls, phones and clothing. Avoid moving contaminated gloves into eating areas and provide washing suited to the contaminant and task. Investigate the source of contact and whether it can be prevented or reduced by design or tools. Record observable control checks and practical improvements without claiming a measurement of absorbed dose. Review new products or work methods and obtain relevant occupational-health advice if concerns or symptoms arise.
A worker who reports wheeze, breathlessness, rash, recurrent headache or other suspected effects needs an appropriate occupational-health or clinical pathway. Symptoms are not a self-contained diagnosis, and they may have non-work causes; nonetheless, they are evidence that the COSHH assessment and controls should be reviewed. A clinician should interpret individual results. The employer needs actionable fitness and control information and group trends, while confidential medical details are protected. Discuss adjustments privately and avoid exposing personal health information in an AI knowledge base.
HSE identifies direct immersion, splashing, handling contaminated workpieces, touching surfaces or clothing, airborne deposits and wet work as contact routes. Assess hands, forearms, face, neck and other exposed areas; do not focus on gloves alone. Contaminated glove removal can transfer material to skin. Wrong glove material can permeate, and a long use period or puncture can defeat protection. Barrier creams are not a substitute for suitable controls or gloves. An SDS may flag skin hazard, but actual contact patterns still need observation.
Who should use this anatomy and routes of exposure page?
This page is for people who need to understand how hazardous substances reach the body and what controls that requires.
Who should use this anatomy and routes of exposure page? — part 1 of 2


Read the complete visual as text
- This page is for people who need to understand…: This page is for people who need to understand how hazardous substances reach the body and what controls that requires.
- Workers and supervisors: People handling, mixing, cutting, spraying, cleaning or disturbing substances that may enter the body.
- COSHH assessors: People deciding exposure routes, control measures, monitoring and health surveillance needs.
Who should use this anatomy and routes of exposure page? — part 2 of 2


Read the complete visual as text
- Occupational health and hygiene advisers: People interpreting exposure, symptoms, health surveillance and biological monitoring.
- Learners: People studying occupational health, COSHH, toxicology basics and scenario-based risk control.
Workers and supervisors
People handling, mixing, cutting, spraying, cleaning or disturbing substances that may enter the body.
COSHH assessors
People deciding exposure routes, control measures, monitoring and health surveillance needs.
Occupational health and hygiene advisers
People interpreting exposure, symptoms, health surveillance and biological monitoring.
Learners
People studying occupational health, COSHH, toxicology basics and scenario-based risk control.
How can I practise this topic in 3D?


Open hardener and thinner at the mixing bench
All related inspection points 1 across 1 location
Garage workshop 1 inspection point
Practice in the SHAREhub environment. Browser practice is separate from workplace competence and formal learning records.
What are the key points about routes of exposure?
The key point is that control measures must match how the substance can enter and affect the body.
Best-practice guide: Hazardous Substances, Anatomy and Routes of Exposure
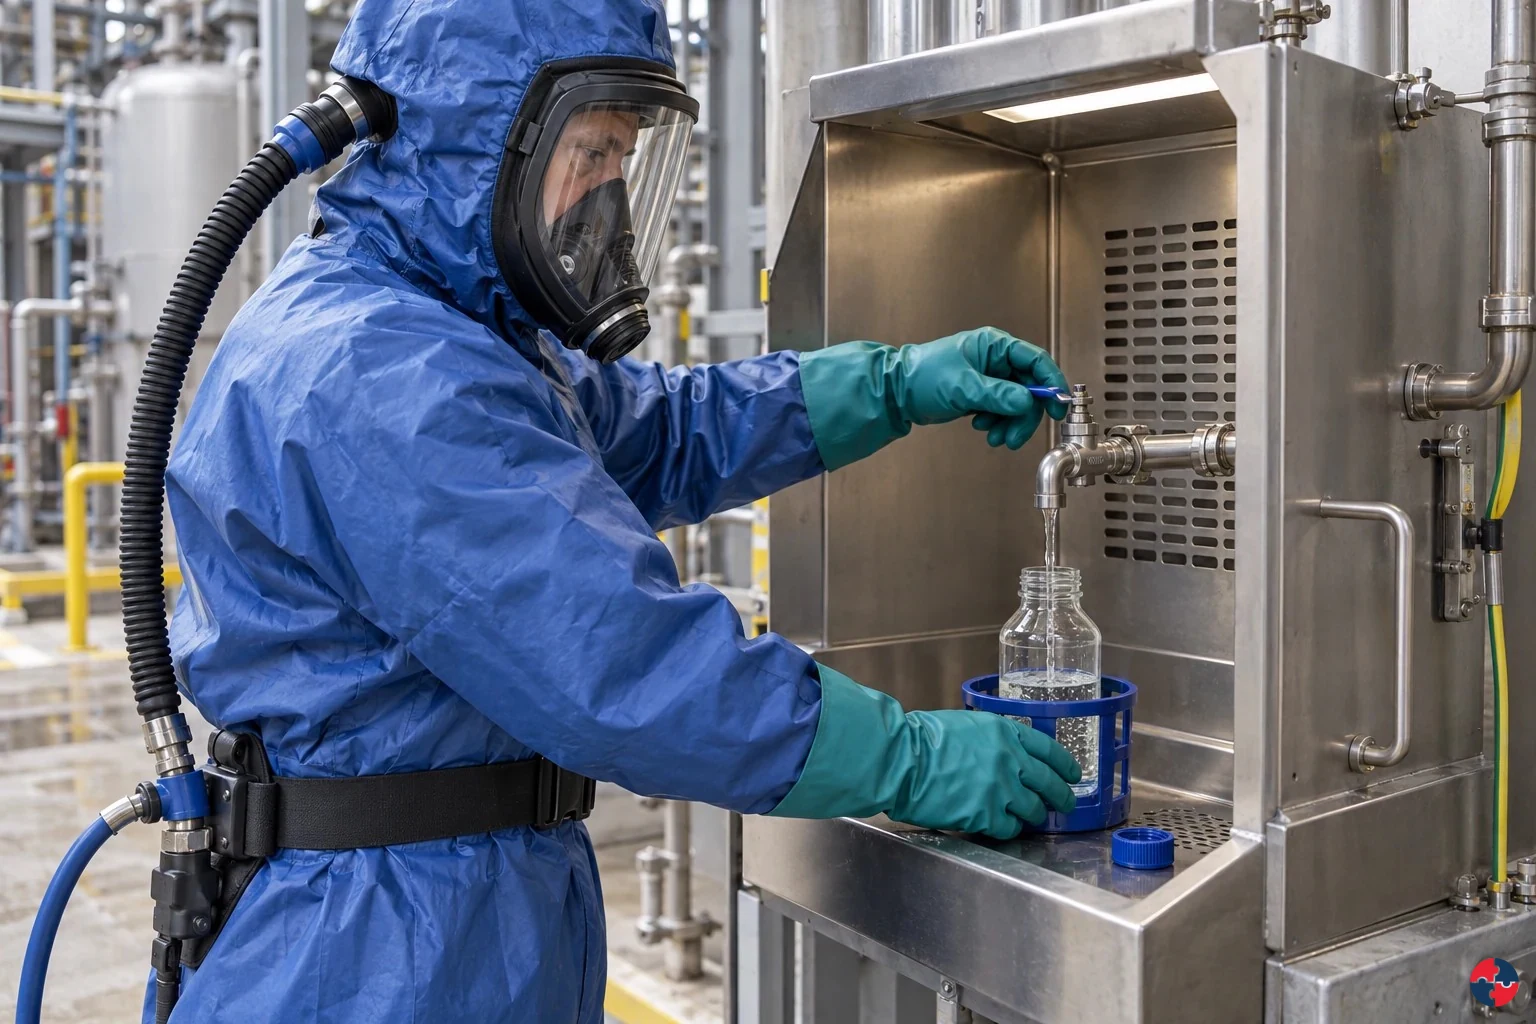
What are the key points about routes of exposure?
The key point is that control measures must match how the substance can enter and affect the body. Hazardous substances harm the body through routes of exposure: inhalation into the lungs, skin and eye contact, absorption through the skin, ingestion, injection and sometimes transfer from contaminated surfaces.
Turn hazardous substances, anatomy and routes of exposure knowledge into a decision
Hazardous substances harm the body through routes of exposure: inhalation into the lungs, skin and eye contact, absorption through the skin, ingestion, injection and sometimes transfer from contaminated surfaces. The health effect depends on the substance, physical form, dose, duration, frequency, target organ, individual susceptibility and whether the effect is acute, chronic, local or systemic. Route-of-exposure matrix and COSHH assessments.
the site team worked example
Assessing: Identify inhalation, skin, eye, ingestion and injection routes for each task. Evidence / response: Route-of-exposure matrix and COSHH assessments. Analysing: Compare task frequency, duration, vulnerable workers, controls and monitoring evidence. Evidence / response: Risk register and health surveillance review.
Warning signs and harm routes
RPE issued but skin contact ignored: Dermatitis, burns or absorption can continue. Gloves worn all day: Sweating, contamination and dermatitis may worsen. Eating near dusty work: Ingestion route becomes credible.
Choose controls for hazardous substances, anatomy and routes of exposure
Eliminate HSE five-level hierarchy: Use pre-cast or delivered ready-formed units so workers do not mix cement powder or handle wet mortar on site. Reduce: Use a suitable lower-dust supplied form and test a lower-chromate or alternative binder only where structural specification permits. Isolate HSE five-level hierarchy: Separate the mixing point from other trades and route dusty bag opening away from clean welfare. Control: Use a closed or low-dust mixer, controlled water feed and splash guard so powder and wet cement do not reach lungs, skin or eyes. Control: Keep clean and dirty tools separate, wash promptly after contact and prohibit contaminated eating areas. Read the full control table for qualifications, ownership and verification. Use the actual task and applicable jurisdiction; existing technical approval remains unchanged.
Use the full hazardous substances, anatomy and routes of exposure lesson
Use the full topic for the decision points, practical examples, detailed control tables and source scope. HSE guidance applies to Great Britain; use HSENI for the Northern Ireland route and the source’s stated jurisdiction. A simplified guide does not change the page’s technical-review or approval status.

Read all six steps as text
1. What are the key points about routes of exposure?
The key point is that control measures must match how the substance can enter and affect the body.
- Avoid / redesign: Use pre-cast or delivered ready-formed units so workers do not mix cement powder or handle wet mortar on site.
- Control the task: Separate the mixing point from other trades and route dusty bag opening away from clean welfare.
- Verify before release: Unit cannot fit or creates a lifting hazard; reassess before claiming elimination.
The key point is that control measures must match how the substance can enter and affect the body. Hazardous substances harm the body through routes of exposure: inhalation into the lungs, skin and eye contact, absorption through the skin, ingestion, injection and sometimes transfer from contaminated surfaces.
Apply it: Which part of this plan would you check at the workface before authorising the task?
2. Turn hazardous substances, anatomy and routes of exposure knowledge into a decision
Use the evidence to improve the actual work arrangement.
- Change at source: Use pre-cast or delivered ready-formed units so workers do not mix cement powder or handle wet mortar on site.
- Make it observable: Unit cannot fit or creates a lifting hazard; reassess before claiming elimination.
- Keep useful evidence: Route-of-exposure matrix and COSHH assessments.
Hazardous substances harm the body through routes of exposure: inhalation into the lungs, skin and eye contact, absorption through the skin, ingestion, injection and sometimes transfer from contaminated surfaces. The health effect depends on the substance, physical form, dose, duration, frequency, target organ, individual susceptibility and whether the effect is acute, chronic, local or systemic. Route-of-exposure matrix and COSHH assessments.
Apply it: What evidence would show that the change improves this task, rather than only completing a record?
3. the site team worked example
Example: a practical application of the existing topic lesson.
- Assessing: Identify inhalation, skin, eye, ingestion and injection routes for each task.
- Analysing: Compare task frequency, duration, vulnerable workers, controls and monitoring evidence.
- Implementing: Use wet methods, extraction, welfare segregation, gloves, goggles, RPE and hygiene controls.
Assessing: Identify inhalation, skin, eye, ingestion and injection routes for each task. Evidence / response: Route-of-exposure matrix and COSHH assessments. Analysing: Compare task frequency, duration, vulnerable workers, controls and monitoring evidence. Evidence / response: Risk register and health surveillance review.
Apply it: At which point would you hold this example, and what evidence would allow it to proceed?
4. Warning signs and harm routes
Connect the task, the route to the person and the control that can fail.
- RPE issued but skin contact ignored: Dermatitis, burns or absorption can continue.
- Gloves worn all day: Sweating, contamination and dermatitis may worsen.
- Eating near dusty work: Ingestion route becomes credible.
RPE issued but skin contact ignored: Dermatitis, burns or absorption can continue. Gloves worn all day: Sweating, contamination and dermatitis may worsen. Eating near dusty work: Ingestion route becomes credible.
Apply it: Who could be exposed, including other trades, cleaners, maintainers and people nearby?
5. Choose controls for hazardous substances, anatomy and routes of exposure
Start with the stronger practicable options and verify their effect.
- Eliminate HSE five-level hierarchy: Use pre-cast or delivered ready-formed units so workers do not mix cement powder or handle wet mortar on site.
- Reduce: Use a suitable lower-dust supplied form and test a lower-chromate or alternative binder only where structural specification permits.
- Isolate HSE five-level hierarchy: Separate the mixing point from other trades and route dusty bag opening away from clean welfare.
- Control: Use a closed or low-dust mixer, controlled water feed and splash guard so powder and wet cement do not reach lungs, skin or eyes.
- Control: Keep clean and dirty tools separate, wash promptly after contact and prohibit contaminated eating areas.
Eliminate HSE five-level hierarchy: Use pre-cast or delivered ready-formed units so workers do not mix cement powder or handle wet mortar on site. Reduce: Use a suitable lower-dust supplied form and test a lower-chromate or alternative binder only where structural specification permits. Isolate HSE five-level hierarchy: Separate the mixing point from other trades and route dusty bag opening away from clean welfare. Control: Use a closed or low-dust mixer, controlled water feed and splash guard so powder and wet cement do not reach lungs, skin or eyes. Control: Keep clean and dirty tools separate, wash promptly after contact and prohibit contaminated eating areas. Read the full control table for qualifications, ownership and verification. Use the actual task and applicable jurisdiction; existing technical approval remains unchanged.
Apply it: Which stronger option can be used here, and who will verify it before accepting the remaining risk?
6. Use the full hazardous substances, anatomy and routes of exposure lesson
Follow the official sources below and retain the task-specific evidence.
- Official guidance: HSE COSHH overview
- Official guidance: HSENI COSHH
- Task decision: Route-of-exposure matrix and COSHH assessments.
Use the full topic for the decision points, practical examples, detailed control tables and source scope. HSE guidance applies to Great Britain; use HSENI for the Northern Ireland route and the source’s stated jurisdiction. A simplified guide does not change the page’s technical-review or approval status.
Apply it: Which official source and full-topic section will you use to resolve the next decision?
Inhalation is common but not the only route
Dusts, fumes, gases, mists and vapours can be breathed in, but skin, eye and ingestion routes may still dominate for some substances.
Physical form changes risk
A liquid, vapour, powder, aerosol or fibre may need very different controls even where the chemical name is similar.
Dose and duration matter
High short exposure can cause acute harm; lower repeated exposure can cause chronic disease.
Target organs matter
Some substances affect lungs, skin, liver, nervous system, blood, kidneys or reproductive health.
Personal health information needs care
Symptoms, health surveillance and medical findings must be handled confidentially and competently.
Which body systems can hazardous substances affect?
Hazardous substances can affect the respiratory system, skin, eyes, nervous system, blood, liver, kidneys and reproductive system.
A simple COSHH assessment should still show an understanding of the body system at risk. All welding fume, including mild-steel fume, can cause lung cancer; its composition may also affect other organs. Solvents may affect the nervous system and skin. Isocyanates may sensitise the airways. Cement can burn skin and eyes. Lead can affect blood, nerves and reproduction. HSE welding health risks
This does not mean managers diagnose disease. It means they understand enough to prevent exposure and use occupational health advice where health surveillance or individual advice is needed.
| Body system | Example exposure | Possible workplace control focus |
|---|---|---|
| Respiratory system | Silica dust, welding fume, flour dust or isocyanates. | Substitution, enclosure, LEV, wet methods, RPE and health surveillance. HSE welding lung cancer |
| Skin | Wet cement, solvents, oils, epoxy resins or cleaning chemicals. | Avoid contact, gloves, skin care, hygiene and skin checks. |
| Eyes | Acids, alkalis, dusts and sprays. | Splash prevention, goggles/face shield and eyewash. |
| Nervous system | Solvents, metals or certain gases. | Ventilation, substitution, exposure monitoring and medical advice. |
| Blood and organs | Lead, benzene, carbon monoxide or some solvents.HSE lead effects HSE benzene effects HSE CO mechanism HSE solvent effects | Specific controls, monitoring and health surveillance. |
| Reproductive health | Lead, some solvents and reproductive toxicants. | COSHH review, individual risk assessment and specialist advice. |
What are the main routes of exposure?
The main routes are breathing in, skin or eye contact, swallowing and injection through broken skin.
Most substance assessments should explicitly list relevant routes. If the only route considered is inhalation, skin absorption or ingestion may be missed. If only the safety data sheet is read, process-generated dust or fume may be missed.
The best control packages cut the route. Prevent the substance becoming airborne, stop it touching skin, keep it away from eyes, prevent contamination of hands and stop sharps or high-pressure injection injuries.
| Route | How it occurs | Controls that usually matter |
|---|---|---|
| Inhalation | Breathing dust, fume, mist, gas, vapour or bioaerosol. | Enclosure, LEV, ventilation, wet methods, RPE and monitoring. HSE good control HSENI COSHH |
| Skin contact/absorption | Liquid, paste, dust or contaminated surfaces contact skin. | Substitution, closed handling, gloves, hygiene and skin surveillance. HSE good control HSENI COSHH |
| Eye contact | Splash, spray, dust, vapour or contaminated glove contact. | Splash control, eye protection and eyewash. HSE good control HSENI COSHH |
| Ingestion | Contaminated hands, food, drink, cigarettes or poor welfare. | Handwashing, clean welfare, no eating in work areas and hygiene rules. HSE good control HSENI COSHH |
| Injection | Needles, sharps, high-pressure fluid or puncture wounds. | Sharps controls, pressure isolation, guarding and emergency response. HSE good control HSENI COSHH |
What simple route examples make exposure easier to remember?
Simple route examples show that the same job can expose different parts of the body in different ways.
Simple exposure route examples — part 1 of 2


Read the complete visual as text
- Inhalation: Workplace example: Sanding hardwood or cutting concrete without effective extraction puts fine dust into the breathing zone. What control should interrupt the route: Capture dust at source, use wet methods where suitable, maintain extraction and use fit-tested RPE where needed.
- Skin absorption: Workplace example: Solvent degreasing with the wrong gloves allows solvent contact, de-fatting and possible absorption. What control should interrupt the route: Substitute the solvent, use closed handling, choose compatible gloves and set glove change rules.
- Ingestion: Workplace example: Lead, silica or cement dust on hands is transferred to food, drink, cigarettes or a phone. What control should interrupt the route: Separate clean and dirty areas, wash hands before breaks and prohibit eating in contaminated work areas.
Simple exposure route examples — part 2 of 2


Read the complete visual as text
- Injection: Workplace example: A hydraulic leak is checked by hand and high-pressure fluid penetrates the skin. What control should interrupt the route: Isolate and depressurise systems, never test leaks by hand and arrange immediate medical assessment after suspected injection.
- Eye exposure: Workplace example: Wet cement slurry or an alkaline cleaner splashes into the eye. What control should interrupt the route: Control splash, use goggles or face protection and provide accessible eyewash.
Routes of exposure are often easier to learn through tasks than definitions. A construction worker cutting concrete may inhale dust, get dust on hands and transfer it to the mouth at break time. A mechanic degreasing parts may breathe vapour and absorb solvent through skin. A cleaner handling sharps may face an injection route that has nothing to do with air monitoring.
This is why COSHH assessments should not stop at the product label. They should describe how people actually work, how contamination moves, what body route is credible and what control blocks that route.
| Route | Workplace example | What control should interrupt the route |
|---|---|---|
| Inhalation | Sanding hardwood or cutting concrete without effective extraction puts fine dust into the breathing zone. | Capture dust at source, use wet methods where suitable, maintain extraction and use fit-tested RPE where needed. HSE good control practice |
| Skin absorption | Solvent degreasing with the wrong gloves allows solvent contact, de-fatting and possible absorption. | Substitute the solvent, use closed handling, choose compatible gloves and set glove change rules. HSE good control practice |
| Ingestion | Lead, silica or cement dust on hands is transferred to food, drink, cigarettes or a phone. | Separate clean and dirty areas, wash hands before breaks and prohibit eating in contaminated work areas. HSE good control practice |
| Injection | A hydraulic leak is checked by hand and high-pressure fluid penetrates the skin. | Isolate and depressurise systems, never test leaks by hand and arrange immediate medical assessment after suspected injection. HSE good control practice |
| Eye exposure | Wet cement slurry or an alkaline cleaner splashes into the eye. | Control splash, use goggles or face protection and provide accessible eyewash. HSE good control practice |
How does inhalation exposure occur?
Inhalation exposure occurs when airborne contaminants enter the breathing zone and are breathed into the nose, throat or lungs.
The breathing zone is the air a worker actually breathes, not just the general area. A visible cloud is not required for exposure; fine dusts, vapours, gases and fumes may be invisible. Particle size matters because larger inhalable particles may deposit in the nose and upper airways, while respirable particles can reach deeper into the lungs.
Good inhalation control starts at source: avoid the substance, use a safer form, enclose the process, capture contaminants with local exhaust ventilation, suppress dust with water, reduce time and only then rely on respiratory protective equipment where needed.
| Substance form | Task example | Control focus |
|---|---|---|
| Respirable dust | Cutting concrete, chasing walls or sanding fillers. | Wet suppression, on-tool extraction, RPE and housekeeping. HSE good control practice |
| Fume | Welding, soldering or hot cutting coated metal. | LEV, process selection, respiratory protection and monitoring. HSE good control practice |
| Vapour | Solvent cleaning, painting or fuel handling. | Substitution, ventilation, containment and DSEAR review where flammable. HSE good control practice |
| Gas | Carbon monoxide, chlorine or refrigerant release. | Detection, ventilation, isolation and emergency response. HSE good control practice |
| Bioaerosol | Waste handling, sewage work or contaminated water systems. | Enclosure, hygiene, PPE and infection-control procedures. HSE good control practice |
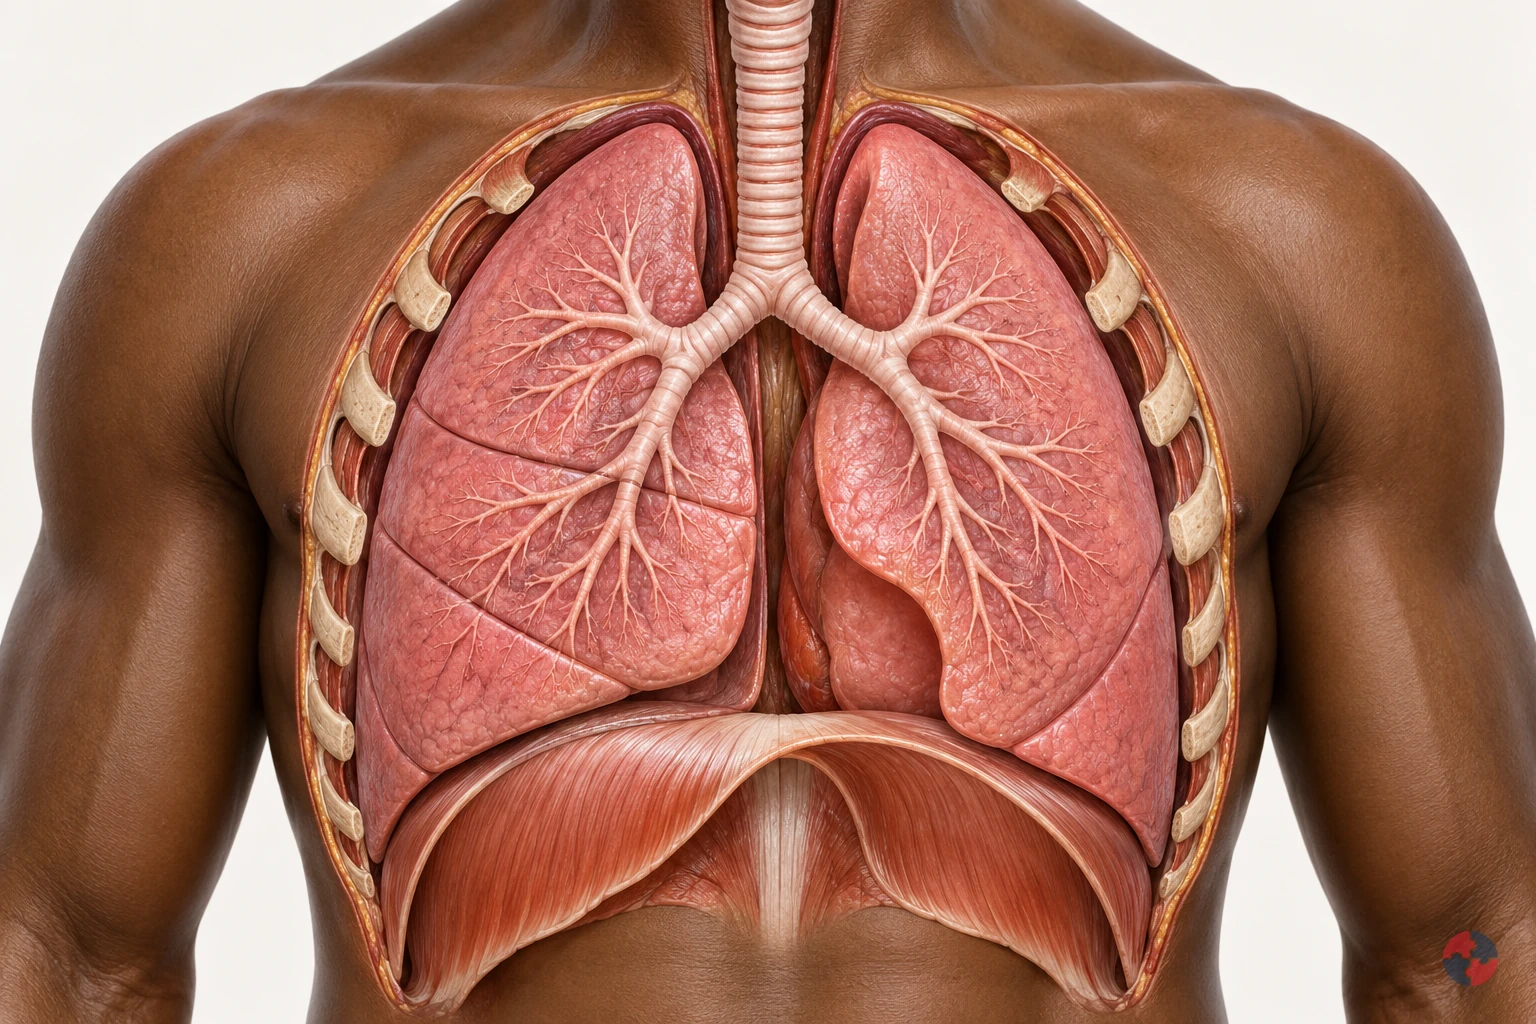
How do the lungs work, and how can workplace exposures affect breathing?
Interactive anatomy · Respiratory tract and lungs · Updated 2026-10-23
Read all anatomy and process explanations without the viewer
Simplified education, not diagnosis, a lung-function or oxygen-saturation test, an exposure calculator or a fitness-to-work assessment. No breath-holding challenge, breathing-rate score or personal health-data collection. Ordinary particle filters do not protect against every gas or oxygen deficiency. COPD and coal-dust topics may reuse normal anatomy only until separate mechanisms are reviewed.
Nose and mouth
Air enters and leaves here. The nose and mouth connect the outside air with the respiratory passages. Air moves through these openings on both the inward and outward breath. Follow the route towards the windpipe before looking at the smaller branches. The illustrated flow is air, a mixture of gases, rather than pure oxygen passing directly into blood. Frimley Health NHS Foundation Trust: How your lungs work · Central and North West London NHS Foundation Trust: How do we breathe?
Trachea
The windpipe carries air into the chest. The trachea, commonly called the windpipe, carries air down towards the chest. It divides into the two main bronchi that supply the lungs. Locate this shared passage before following either branch. Its role is to conduct air towards the gas-exchange regions and provide an outward route for the next exhalation. Frimley Health NHS Foundation Trust: How your lungs work
Bronchi
A main branch carries air into each lung. The two main bronchi take air from the windpipe into the right and left lungs. They divide into progressively smaller branches, distributing the breath through the lungs. Use the split as a landmark before following one highlighted route. These are air passages, distinct from the blood vessels that run through the same organs. Frimley Health NHS Foundation Trust: How your lungs work · University Hospitals of North Midlands NHS Trust: My lung surgery: about your lungs
Bronchioles
Smaller branches distribute air. Bronchioles are smaller branches of the airway system inside the lungs. Their branching routes lead towards clusters of alveoli, where the breath reaches the gas-exchange surface. Follow one branch to its end, using the others as context. This simplified route represents part of a much larger network supplying the lungs together. Frimley Health NHS Foundation Trust: How your lungs work
Alveoli
Tiny air sacs provide a gas-exchange surface. Alveoli are tiny air sacs at the ends of the small airway routes. Their close relationship with surrounding capillaries allows oxygen to pass towards blood and carbon dioxide towards alveolar air. Connect the highlighted cluster with the enlarged gas-exchange view. The enlargement changes the scale so the air space and neighbouring blood vessel can be distinguished. Frimley Health NHS Foundation Trust: How your lungs work · Central and North West London NHS Foundation Trust: How do we breathe?
Air–blood barrier
A thin boundary separates air from blood. The thin alveolar and capillary walls separate air in the sac from blood in its neighbouring vessel. Oxygen and carbon dioxide cross this boundary in opposite directions. Locate the tissue between the two spaces in the enlarged view. Blood cells remain in the vessel; the model does not represent an open connection through which air and blood mix. Central and North West London NHS Foundation Trust: How do we breathe?
Pulmonary capillaries
Small blood vessels pass beside the air sacs. Pulmonary capillaries are small blood vessels beside the alveoli. Blood moving through them receives oxygen and releases carbon dioxide across the thin exchange boundary, then continues through the circulation. Follow the labelled gas routes separately from the blood cells. These cells stay inside the capillary rather than moving into the air sac. Central and North West London NHS Foundation Trust: How do we breathe?
Diaphragm
This muscle helps make room for a breath. The diaphragm is a broad, dome-shaped breathing muscle beneath the lungs. It contracts and flattens downwards during inhalation, helping increase the space in the chest. During a quiet exhalation it relaxes towards its dome shape. Compare it with the rib cage: their changing positions help move air without the lung tissue acting as a contracting muscle. Cambridge University Hospitals NHS Foundation Trust: Breathing techniques to ease breathlessness: muscles involved
Rib cage and breathing muscles
Chest movement changes the space around the lungs. The rib cage protects the chest organs and moves with the breathing muscles. Expansion upwards and outwards helps increase chest space during inhalation; relaxation reduces that space during a quiet exhalation. Compare this movement with the diaphragm below the lungs. Together these structures provide the mechanics that allow air to move through the airways. Central and North West London NHS Foundation Trust: How do we breathe? · Cambridge University Hospitals NHS Foundation Trust: Breathing techniques to ease breathlessness: muscles involved
Pleura
Two thin layers surround the lungs and line the chest. The pleura has two thin layers around the lungs and inside the chest wall. A small amount of fluid between them allows the surfaces to slide with less friction as breathing changes the chest space. Locate this outer covering separately from the internal air sacs; it is not the thin air–blood exchange boundary. Blackpool Teaching Hospitals NHS Foundation Trust: Pleural clinic
Open the complete process transcript
The process, step by step
1 · Make space
Breathing in begins with a change in the space inside the chest. The diaphragm, a dome-shaped muscle beneath the lungs, contracts and moves downwards. Muscles around the ribs help lift the chest upwards and outwards. As the lungs expand with this changing space, air can enter through the airways. Locate the diaphragm and rib cage together rather than treating the lungs as muscles that pull themselves open. The model separates the movement into a teaching step so you can follow its purpose. In the body, chest movement, airflow and blood circulation are connected parts of a continuing process. Central and North West London NHS Foundation Trust: How do we breathe? · Cambridge University Hospitals NHS Foundation Trust: Breathing techniques to ease breathlessness: muscles involved
What to watch: Locate the diaphragm beneath the lungs and the rib cage around them; compare their positions with the space occupied by the lungs.
Why it matters: Changing the chest space draws air into the lung passages. The breathing muscles supply the movement, while the lungs expand with the chest to receive the next breath.
Explore this step: Select the diaphragm and rib cage in turn, then explain how their movement helps air enter without the lungs contracting like muscles.
2 · Move air
Air entering through the nose or mouth travels down the trachea, or windpipe, towards the chest. The trachea divides into the two main bronchi, with one route supplying each lung. Follow this continuous passage in the whole-chest view before moving into the smaller branches. The moving air is a mixture of gases, including oxygen; it is not a stream of pure oxygen travelling straight into the blood. These larger airways carry the breath towards the places where gas exchange happens. The same connected passages also provide the outward route when air is breathed out. Frimley Health NHS Foundation Trust: How your lungs work
What to watch: Start at the nose and mouth, follow the trachea downwards and find the split into the right and left main bronchi.
Why it matters: The larger passages distribute air to both lungs and connect the outside air with the smaller branches inside. Gas exchange takes place further along the route, rather than within the windpipe.
Explore this step: Trace the route to each lung and distinguish the tubes carrying air from the separate vessels carrying blood.
3 · Reach the air sacs
Inside each lung, the bronchi divide into smaller branches called bronchioles. These passages distribute air towards clusters of tiny air sacs, the alveoli. Follow one branch in the close-up and connect its end with an air-sac cluster, using the other branches as surrounding context. These routes distribute the breath throughout the lungs rather than supplying only one working air sac. A real lung contains many branching routes and air sacs operating together. This distribution brings air close to a large network of small blood vessels, preparing for the exchange shown in the next view. Frimley Health NHS Foundation Trust: How your lungs work
What to watch: Follow one smaller airway to the cluster of air sacs at its end, keeping the other branches as surrounding context.
Why it matters: Branching delivers air throughout the lungs instead of to one large chamber. The many air sacs bring the inhaled gases close to blood vessels where oxygen and carbon dioxide can cross.
Explore this step: Trace one complete branch to its air sacs, then explain how the many branches distribute air throughout the lungs.
4 · Change scale
The lesson now changes from a branching airway to an enlarged air–blood interface. An alveolus contains air; beside it runs a capillary containing blood. Their very thin walls form the boundary across which gases can move. Locate the air space, the separating tissue and the inside of the vessel before following any gas symbols. The magnified view represents a tiny part of the same lung, not a separate organ or a hole that joins air and blood into one space. The enlargement helps explain how the two systems can exchange gases while keeping their contents separate. Central and North West London NHS Foundation Trust: How do we breathe?
What to watch: Find the air inside the enlarged alveolus, the thin separating boundary and the neighbouring capillary with blood cells inside it.
Why it matters: A close boundary allows gases to cross between alveolar air and capillary blood. Keeping the two spaces separate lets ventilation and circulation cooperate without blood cells entering the air sac.
Explore this step: Identify the air space and blood-vessel space, then point to the boundary each gas must cross between them.
5 · Exchange gases
At the air–blood boundary, oxygen moves from the alveolar air into the capillary blood. At the same time, carbon dioxide carried back from the body moves from the blood into the air sac. The two gases cross in opposite directions; blood cells stay within the vessel. Follow each labelled symbol separately so that exchanging gases is not confused with mixing the air and blood together. Blood then carries oxygen onwards towards the heart and the body’s tissues. The teaching symbols simplify continuous gas movement, and their size, colour and speed do not represent a measurement. Central and North West London NHS Foundation Trust: How do we breathe?
What to watch: Follow the O₂ symbol towards the capillary and the CO₂ symbol towards the air sac, while locating the blood cells within the vessel.
Why it matters: Oxygen can be carried onwards for use by the body, while carbon dioxide returns to the airways for removal. Both transfers connect the breath with the continuing circulation of blood.
Explore this step: Trace the two gas routes in opposite directions and explain why a blood cell should remain inside the capillary.
6 · Breathe out
During a quiet breath out, the diaphragm and other breathing muscles relax. The diaphragm returns towards its dome shape, chest space decreases and air moves back along the airways to the nose or mouth. This outgoing air carries carbon dioxide that crossed from the blood into the alveoli. Trace the route in reverse without reversing the direction of blood circulation: oxygen-carrying blood continues towards the heart while another breath prepares to enter. The model presents a single cycle to explain the relationship. It does not show breathing as a series of separate events in which circulation stops between steps. Central and North West London NHS Foundation Trust: How do we breathe? · Cambridge University Hospitals NHS Foundation Trust: Breathing techniques to ease breathlessness: muscles involved
What to watch: Compare the diaphragm and chest with the inhalation step, then follow the outward airway route from the lungs to the nose or mouth.
Why it matters: Exhalation removes air containing carbon dioxide from gas exchange. Meanwhile, blood circulation continues carrying oxygen onwards, linking this breathing cycle with the needs of the rest of the body.
Explore this step: Trace the outward air route and the onward blood route separately, then describe why they are connected processes with different pathways.
Read the practice situations and all answer explanations
Sources and how the model is made
The opening images are AI-generated anatomical illustrations. The interactive 3D models and labelled SVG diagrams use original procedural artwork. These teaching images are not medical scans or diagnostic tools. Source references support the learner explanations and do not grant artwork rights.
- Frimley Health NHS Foundation Trust: How your lungs work — Normal airway branching, air sacs and capillary gas exchange; factual text only.
- Central and North West London NHS Foundation Trust: How do we breathe? — Thin alveolar/capillary walls, opposing gas transfer, circulation and chest mechanics. No illustrations or exercises copied.
- Cambridge University Hospitals NHS Foundation Trust: Breathing techniques to ease breathlessness: muscles involved — Diaphragm movement and breathing-muscle context only; this module does not prescribe breathing exercises.
- HSE: Health risks from welding — Welding-related airway irritation, possible deeper injury and irritant asthma; not a universal pattern for every gas.
- HSE: Asthma: an overview — Sensitisation, later triggering and work aggravation. Legacy labelling language and statistics are not reused.
- HSE: Advice for employers: occupational asthma — Exposure prevention, controls and health surveillance only; legacy legislation wording is not reused.
- NHS: Silicosis — Silica-associated inflammation/fibrosis, varying latency, irreversible damage and possible progression after exposure stops.
- HSE: Why is asbestos dangerous? — Asbestosis, mesothelioma and pleural disease are distinct; long disease latency.
- HSE: Construction dust: cutting paving blocks, kerbs and flags — Task design, source suppression/extraction, suitable RPE and checking controls; not a generic dust safe-dose rule.
- NHS: Shortness of breath — Emergency recognition of severe breathing difficulty and 999; emergency advice is outside the activity.
- NHS: Asthma — Narrowed/swollen airways, symptoms and clinical diagnosis; no medication doses or treatment plan reproduced.
- University Hospitals of North Midlands NHS Trust: My lung surgery: about your lungs — Right/left lung lobe counts and airway anatomy; no source image copied.
- Blackpool Teaching Hospitals NHS Foundation Trust: Pleural clinic — Pleural layers and the small lubricating fluid layer outside lung tissue; no procedural teaching included.
- HSE: Asphyxiation hazards in welding and allied processes — Oxygen-deficient spaces and need for independent air supply; no unprotected entry or rescue.
- HSE: Respiratory protective equipment at work — RPE selection must match the contaminant and conditions; filtering protection is not a supply of oxygen.
- HSE: Flour dust and risks to bakers — Flour sensitisation and practical reduction of dusty handling; exposure-limit numbers are not reused.
- Health and Safety Executive: Asbestos essentials — Task planning, training and competent asbestos work arrangements for the maintenance exposure example; not permission to disturb unknown material or a licence/classification decision.
- Health and Safety Executive: Welding fume: protect your workers — Alternative joining, fume reduction, LEV, suitable RPE and maintained controls for the welding-fume example. No unprotected exposure or rescue procedure.
How does skin exposure occur?
Skin exposure occurs when substances touch, damage or pass through the skin.
Skin is a major exposure route for many substances. Some cause local effects such as irritation, corrosion, dermatitis or sensitisation. Others can be absorbed into the body, meaning air monitoring alone may underestimate total exposure.
Skin control is more than issuing gloves. It includes avoiding contact, choosing the correct glove material, preventing contamination inside gloves, changing gloves in time, washing correctly, using skin care and checking early signs of dermatitis.
| Exposure situation | Why it matters | Control |
|---|---|---|
| Wet work | Repeated wetting and drying can damage the skin barrier. | Task rotation, gloves where suitable, drying and moisturising. HSE preventing work-related skin disease |
| Solvent contact | Can de-fat skin and may be absorbed. | Closed handling, correct gloves and hygiene. HSE construction solvents HSE protective glove selection |
| Cement contact | Can cause alkali burns and dermatitis. | Avoid wet cement in boots/gloves, waterproof PPE and washing. HSE cement exposure |
| Dust contamination | Dust can settle on skin and transfer to mouth or eyes. | Clean work methods, washing and changing. HSE preventing work-related skin disease |
| Glove misuse | Wrong glove can fail or trap contamination. | Glove compatibility, change frequency and training. HSE protective glove selection |
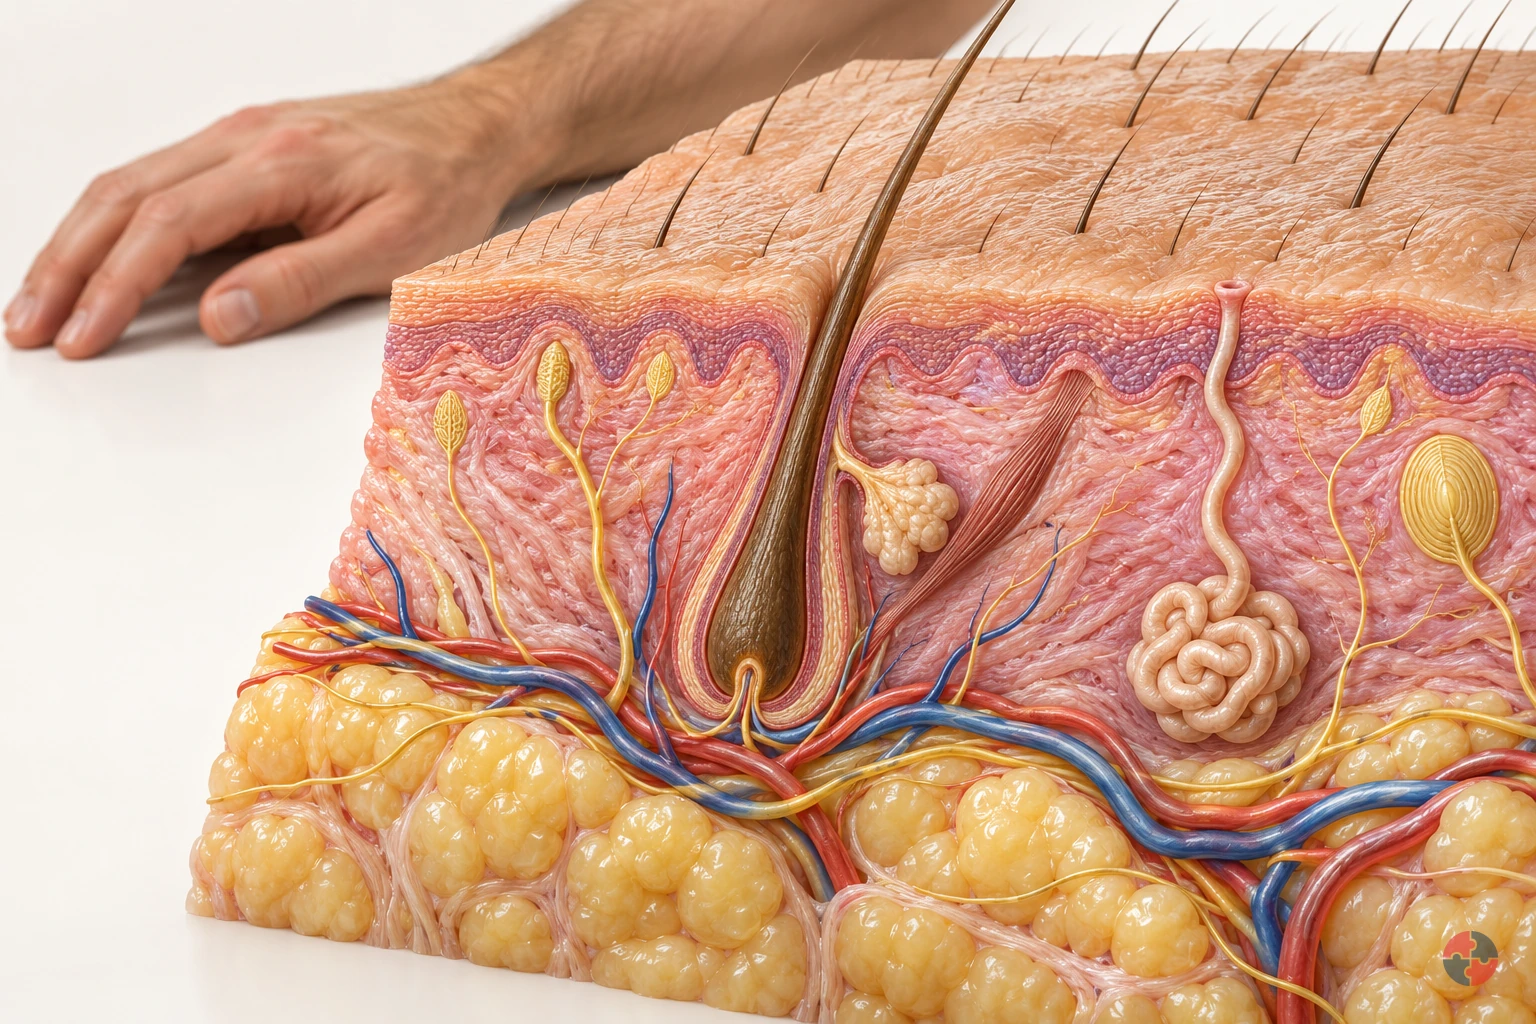
How does the skin barrier work, and how can workplace contact damage it?
Interactive anatomy · Skin barrier and injury · Updated 2026-10-23
Read all anatomy and process explanations without the viewer
General education about normal skin and example mechanisms; not diagnosis, treatment selection or a patient assessment. Hair-bearing forearm example. Vessels remain below the epidermis; the normal barrier has no large open holes. Image-based diagnosis or patch-testing simulation Treatment doses or guaranteed glove/barrier-cream protection Calculated injury depth, contact-dose thresholds or a number of safe washes Hydrofluoric-acid protocols and unreviewed named-substance injury overlays Immediate chemical-burn advice must remain readable outside the model and before any scenario answer.
Outer barrier
The outermost layer helps limit water loss and harmful contact. The outermost epidermal layer combines flattened cells with materials between them to help retain moisture and limit harmful contact. It is a selective protective barrier, rather than a waterproof coating. Use the magnified inset to locate its components. The model shows their relationship but cannot tell whether a particular substance will cross a person’s skin. Health and Safety Executive: Structure and functions of the skin
Barrier lipids
Lipids between surface cells help maintain the barrier. Repeated detergent contact can remove some of these fatty materials and overwhelm repair. Health and Safety Executive: Understanding the causes of skin disease
Epidermis
The outer skin layer continually renews. New cells form in the deeper epidermis and move towards the surface, becoming flattened as the outer layer is renewed and shed. The epidermis therefore contributes active renewal as well as surface protection. Follow its position above the dermis in the cutaway; the model enlarges a static structure rather than timing an individual’s cell renewal. Health and Safety Executive: Structure and functions of the skin
Dermis
Supporting tissue beneath the epidermis contains vessels, nerves and glands. The dermis is supporting tissue beneath the epidermis. It contains structures involved in supply, sensation and temperature regulation, including vessels, nerves and sweat glands. The cutaway enlarges selected components so their different functions can be followed. Their shared location does not mean that they form one open passage through the skin barrier. Oxford Health NHS Foundation Trust: The Skin — Community Tissue Viability Team
Subcutaneous tissue
Tissue and fat below the dermis help insulate and cushion. The lower layer supports the skin block; it is not part of the surface barrier. Health and Safety Executive: Structure and functions of the skin · Oxford Health NHS Foundation Trust: The Skin — Community Tissue Viability Team
Blood vessels
Vessels supply the deeper skin. These vessels supply the deeper skin tissues. They sit below the epidermal surface in the cutaway, alongside other supporting structures. Compare them with the nerve and sweat duct rather than interpreting every tube as the same pathway. The drawing explains location and function; its vessel size and colour are not measurements of circulation or skin temperature. Oxford Health NHS Foundation Trust: The Skin — Community Tissue Viability Team
Sensory nerves
Nerve endings help detect touch and temperature. The signalling symbol represents sensory information, not a visible electrical spark. Health and Safety Executive: Structure and functions of the skin · Oxford Health NHS Foundation Trust: The Skin — Community Tissue Viability Team
Sweat gland and duct
Sweat reaches the surface through a duct. A sweat gland produces sweat that reaches an opening at the surface through a duct. This contributes to the skin’s role in temperature regulation. Trace the coiled gland and its duct separately from the vessels and nerves. The enlarged path makes the connection visible; it does not measure sweating or represent every route by which a substance can enter skin. Health and Safety Executive: Structure and functions of the skin
Hair follicle
Hair grows from a follicle in hair-bearing skin. This forearm example includes a follicle. The palm has a different structure and must not use this site label. Health and Safety Executive: Structure and functions of the skin
Immune response inset
Skin participates in immune responses. In contact allergy, prior sensitisation can lead to an inflammatory response after later contact. Health and Safety Executive: Understanding the causes of skin disease · NHS: Contact dermatitis — causes
Open the complete process transcript
The process, step by step
Find the surface
Start with the forearm locator to establish where this sample of skin belongs. The enlarged block represents hair-bearing skin, with the epidermis on the outside, the dermis beneath it and deeper subcutaneous tissue below. The surface is only one part of this living organ. New epidermal cells are formed deeper down and move towards the outside, where flattened cells contribute to the protective layer. Use the block to connect the familiar body surface with these layers; it is an enlarged teaching section, not a standard thickness shared by every body site. Health and Safety Executive: Structure and functions of the skin
What to watch: Use the forearm locator first, then follow the enlarged block from the outer epidermis down through the dermis to the deeper tissue.
Why it matters: Locating the body site prevents the sample from being mistaken for every kind of skin. The outer layer, supporting tissues and deeper structures contribute different functions within the same organ.
Explore this step: Identify the outermost layer and the hair follicle before changing to the magnified barrier view.
Magnify the barrier
The outer barrier depends on both flattened surface cells and the fatty materials, or lipids, between them. The cells provide one part of the structure; the surrounding lipids help control the passage of water and substances through it. Look at their arrangement together rather than treating the skin as a single waterproof sheet. This is a selective barrier, not a complete seal against every material. The enlargement helps explain why a change in the material between cells can affect protection even when there is no large cut through the skin. Health and Safety Executive: Understanding the causes of skin disease
What to watch: Compare the flattened surface cells with the lipids between them, using the enlarged barrier inset rather than the whole skin block.
Why it matters: The arrangement helps limit unwanted passage through the surface while retaining moisture. Understanding both components explains why skin protection depends on more than whether the surface looks visibly broken.
Explore this step: Point out one surface cell and the surrounding lipid region, then describe how they work together.
Limit water loss
Water retention is part of healthy barrier function. The outer cells and the materials between them help limit water leaving the skin, while some water can still pass through. The labelled arrows represent that background loss; they are not streams from a wound or measurements of an individual’s hydration. Moisture matters because the outer layer needs appropriate hydration to remain flexible and function well. Read the arrows alongside the cell-and-lipid arrangement, so the explanation connects a movement across the surface with the structure that helps regulate it. Health and Safety Executive: Understanding the causes of skin disease
What to watch: Look at the labelled water-loss arrows beside the outer cells and lipids, noting their direction across the barrier surface.
Why it matters: Limiting water loss helps the outer layer retain the moisture needed for normal function. A barrier can perform this role without being impermeable, and the model cannot assess somebody’s skin hydration.
Explore this step: Compare this step with the barrier enlargement and explain why “limits water loss” is more accurate than “waterproof”.
Explore deeper structures
The deeper skin contains structures with different jobs. Blood vessels supply the deeper tissues, sensory nerves help carry information such as touch and temperature, and sweat glands connect to the surface through ducts. Follow each labelled structure separately instead of reading the cutaway as one channel running down through the skin. The enlarged vessels, nerves and gland are learning features within the supporting tissue; their positions explain relationships, not the route or speed of an absorbed substance. Notice that surface barrier function and these deeper functions are connected parts of skin health. Health and Safety Executive: Structure and functions of the skin · Oxford Health NHS Foundation Trust: The Skin — Community Tissue Viability Team
What to watch: Locate the vessels, sensory nerves and coiled sweat gland below the surface, then trace the gland’s duct towards its opening.
Why it matters: Supply, sensation and temperature regulation require different structures. Recognising those roles avoids mistaking every visible line for a chemical entry route or assuming the outer barrier carries out all skin functions.
Explore this step: Select the gland, nerve and vessel labels in turn and name a different function for each.
Connect structure and function
Return to the whole section and connect the functions you have explored. The renewing outer layer helps form a protective barrier and limit moisture loss. Deeper supporting tissues contain sensory structures, vessels and glands, while subcutaneous tissue contributes cushioning and insulation. These functions operate together rather than as a single switch that makes skin either completely protected or unprotected. Use the separate mechanism examples to explore particular changes only after locating the healthy structures. The cutaway explains relationships; its colours and enlarged components do not diagnose a skin condition or identify a safe contact time. Health and Safety Executive: Structure and functions of the skin · Oxford Health NHS Foundation Trust: The Skin — Community Tissue Viability Team
What to watch: Review the complete skin section, connecting the outer barrier with the supporting dermis, sensory structures, sweat gland and deeper tissue.
Why it matters: Skin both separates the body from its surroundings and helps it respond to them. Connecting protection, sensation and temperature functions gives a more useful picture than viewing the surface as a passive covering.
Explore this step: Choose one structure from the surface and one from deeper tissue, and explain how their jobs differ.
Read the practice situations and all answer explanations
Sources and how the model is made
The opening images are AI-generated anatomical illustrations. The interactive 3D models and labelled SVG diagrams use original procedural artwork. These teaching images are not medical scans or diagnostic tools. Source references support the learner explanations and do not grant artwork rights.
- Health and Safety Executive: Structure and functions of the skin — Three skin layers; renewal; sweat, hair, sensory, barrier and temperature functions. Factual reference only; no diagram copied.
- Oxford Health NHS Foundation Trust: The Skin — Community Tissue Viability Team — Layer and deeper vessel/nerve context, mechanical injury and skin-tone assessment considerations. No treatment regimen or illustration reused.
- Health and Safety Executive: Understanding the causes of skin disease — Barrier lipids and water retention; cumulative irritation; sensitisation, delayed contact allergy, small subsequent amounts and coexistence. Replaces the former separate dermatitis URL, which failed direct retrieval.
- NHS: Contact dermatitis — causes — Irritant versus allergic mechanisms and workplace wet work. Printed next-review date May 2026 is overdue; recheck at qualified clinical sign-off and corroborate with HSE.
- Health and Safety Executive: Construction hazardous substances: Cement — Alkaline burns from trapped cement; abrasive irritation; chromate sensitisation; task methods and suitable contact protection.
- Health and Safety Executive: How do I prevent skin problems in my business? — Avoid contact, suitable gloves, washing and drying, skin care, early checks/reporting and medical advice. No universal glove or cream claim.
- NHS: Acid and chemical burns — Immediate chemical skin-burn first aid: 999, avoid contamination, clothing and dry-chemical removal, copious water about one hour, no creams or other chemicals. Skin advice is not substituted for eye or thermal guidance.
- NHS: Cuts and grazes — General shallow-wound context and the need for professional help with serious wounds; not a visual diagnosis or full first-aid simulation.
- NHS: Contact dermatitis — symptoms — Dryness, cracking, inflammation and fluid-filled blisters can occur in contact dermatitis. Irritant and allergic appearances overlap. Original illustrative textures are not diagnostic photographs and no source artwork is copied.
Why is eye exposure important?
Eye exposure can cause rapid injury because the eye is sensitive to splashes, dusts, vapours and corrosive substances.
Eye protection should be selected for the real hazard. Safety glasses may not control a chemical splash. Goggles may be needed for liquid splash, and a face shield may be needed in addition for high-volume or high-energy tasks.
Emergency eyewash should be close, accessible and maintained where splash risk exists. Workers should know not to delay irrigation while searching for a supervisor.
| Scenario | Possible harm | Control |
|---|---|---|
| Chemical splash | Burn, irritation or loss of sight. | Goggles/face shield, splash guard and eyewash. HSE cement exposure |
| Dust blowback | Irritation or corneal injury. | On-tool extraction, goggles and work positioning. HSE eye and face protection |
| Spray mist | Chemical contact and inhalation exposure. | Enclosure, ventilation and suitable eye/face protection. HSE eye and face protection |
| Contaminated glove touch | Transfer of chemical or biological material. | Glove removal technique and hygiene. HSE eye and face protection HSE bloodborne virus routes |
| Pressure release | High-energy fluid or particles strike eye. | Isolation, depressurisation and face protection. HSE eye and face protection HSE hydraulic injection injury alert |
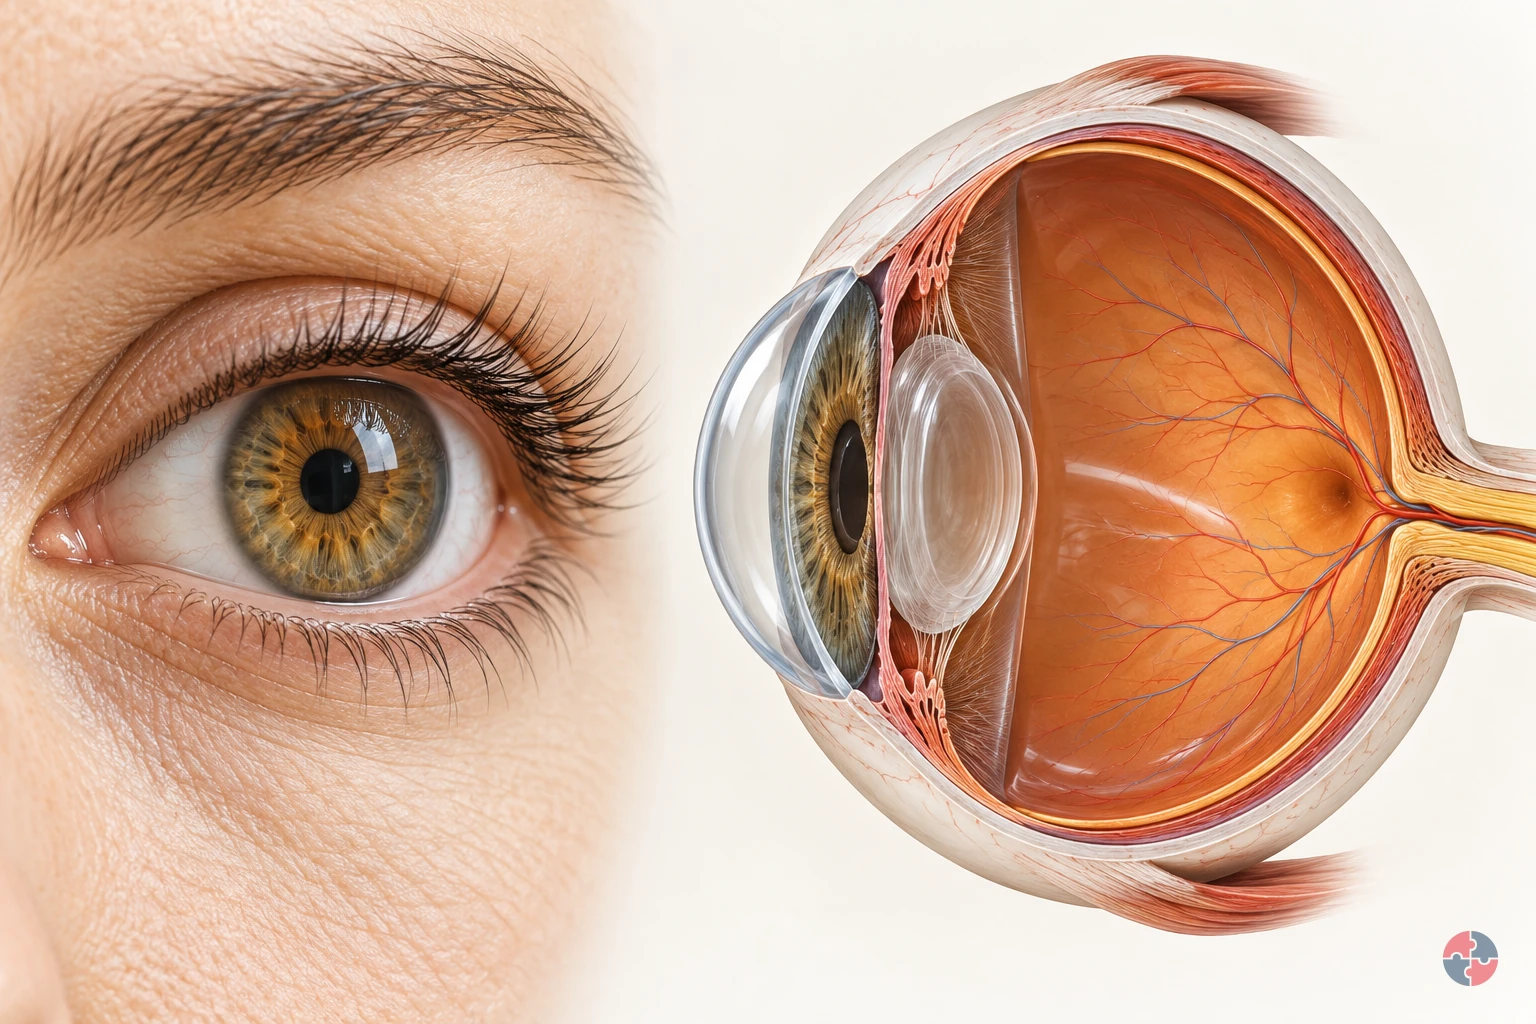
How does the eye turn light into vision, and how do workplace hazards injure it?
Interactive anatomy · Eye function and injury · Updated 2026-10-23
Read all anatomy and process explanations without the viewer
Educational illustration, not a diagnostic symptom checker or a reproduction of an individual’s vision. No acuity/brightness challenge, flashing screen, camera permission, eye-drop prescription, patching instruction, lens-removal manoeuvre or home-neutralisation exercise. Ordinary DSE comfort is separate from trauma; eyesight correction is separate from hazard protection.
Eyelids
Blinking spreads tears over the front of the eye. The eyelids pass over the exposed front of the eye when a person blinks. Their movement spreads the tear film, helping keep that surface moist and smooth. In the surface view, use the lid margins to locate the area they cover. This surface-maintenance role supports the optical pathway; the lid does not carry visual signals to the brain. Moorfields Eye Hospital NHS Foundation Trust: Dry eye: the tear film
Tear film
A thin tear layer keeps the surface moist and smooth. A thin film of tears covers the front of the eye. It lubricates the surface and contributes to a smooth boundary through which light passes. Blinking redistributes this film. Its thickness is enlarged in the teaching view so its position can be seen; it is a surface layer rather than a pool of liquid inside the eyeball. Moorfields Eye Hospital NHS Foundation Trust: Dry eye: the tear film
Cornea
The clear front surface bends incoming light. The transparent cornea forms the curved front of the eye, providing an outer protective boundary and bending incoming light. It works with the lens to focus the light towards the retina. Follow the rays through the front curve in the cutaway, then compare its location with the tear film lying over the surface. Moorfields Eye Hospital NHS Foundation Trust: What makes up your eye
Iris
The coloured ring controls the pupil opening. The iris is the coloured ring around the pupil. Its muscles change the size of the opening and so control how much light can enter the eye. Locate the ring separately from the transparent lens behind it. This light-entry role is different from the focusing work performed by the cornea and lens. Moorfields Eye Hospital NHS Foundation Trust: What makes up your eye
Pupil
An opening lets light enter the eye. The pupil is the central opening in the iris through which light passes. It looks dark when viewed from the front because it opens into the inside of the eye. It is not a solid black disc. In the cutaway, follow the route through this opening towards the transparent lens behind it. Moorfields Eye Hospital NHS Foundation Trust: What makes up your eye
Lens
The clear lens helps focus light on the retina. The transparent lens sits behind the iris and adds to the focusing action of the cornea. In a living eye its shape can change to help focus on objects at different distances. Use the cutaway to locate the lens between the pupil opening and the retina; the simplified ray diagram is not an eyesight test. Moorfields Eye Hospital NHS Foundation Trust: What makes up your eye
Retina
The light-sensitive layer lines the back of the eye. The retina is the light-sensitive tissue lining the inside of the back of the eye. Light focused by the cornea and lens reaches this layer, where specialised cells begin converting it into electrical information. Its position against the inner wall connects the whole-eye view with the separate enlarged photoreceptor inset. Moorfields Eye Hospital NHS Foundation Trust: What makes up your eye · Oxford University Hospitals NHS Foundation Trust: Tackling vision loss: normal signal pathway
Photoreceptors
Specialised retinal cells begin the light-to-signal conversion. Photoreceptors are specialised cells in the retina that respond to light and begin the conversion into electrical signals. Locate the retinal lining first, then connect it with the enlarged cell inset. That inset explains a change of process and scale; it does not represent a separate organ or every cell involved in retinal processing. Oxford University Hospitals NHS Foundation Trust: Tackling vision loss: normal signal pathway
Optic nerve
Visual signals travel from the eye towards the brain. The optic nerve carries electrical information from the retina towards the brain. In the model, the symbol changes from a light ray to a neural signal at the retina to distinguish these processes. Locate where the nerve leaves the back of the eye. Light itself does not travel along the nerve as a beam. Oxford University Hospitals NHS Foundation Trust: Tackling vision loss: normal signal pathway
Brain destination
The brain processes the incoming visual signals. The brain processes the visual information arriving from the eyes, helping us make sense of what we see. This marker shows a destination outside the eyeball rather than a structure within it. Follow the optic-nerve route to the marker after locating the retina; the detailed pathways inside the brain are not depicted here. Oxford University Hospitals NHS Foundation Trust: Tackling vision loss: normal signal pathway
Open the complete process transcript
The process, step by step
1 · Refresh the surface
A blink carries a thin layer of tears across the exposed front of the eye. This tear film keeps the surface moist and helps create a smooth first surface for incoming light. Look at the eyelids and the enlarged tear layer together: the lid spreads the film rather than pushing tears into the eyeball. The surface view separates these structures so their relationship is easier to see. This is the preparation for the optical pathway that follows; a clear view depends on the condition of the front surface as well as the structures deeper inside. Moorfields Eye Hospital NHS Foundation Trust: Dry eye: the tear film
What to watch: Locate the eyelid margins and the thin tear layer in front of the cornea, using the surface view to separate them.
Why it matters: The refreshed film lubricates the front of the eye and helps keep its surface smooth. It supports the passage of light before the cornea and lens focus that light deeper inside.
Explore this step: Select the eyelids, then the tear film, and describe which structure moves and which surface it covers.
2 · Bend incoming light
The cornea is the transparent, curved front of the eye. Incoming light changes direction as it passes through this surface, beginning the focusing process. In the whole-eye cutaway, trace the illustrative rays from outside the eye towards the lens. Their bend shows the cornea doing optical work rather than acting only as a window. The cornea also forms part of the protective outer boundary, so its clarity and shape matter to seeing. The rays simplify the route through a healthy eye; they are not a measurement of an individual person’s focus or vision. Moorfields Eye Hospital NHS Foundation Trust: What makes up your eye
What to watch: Find the clear curved front of the eye and follow where the incoming light rays change direction as they pass through it.
Why it matters: Beginning to direct the light here allows the cornea and lens to work together. A transparent front surface lets light enter while forming part of the eye’s protective boundary.
Explore this step: Trace one ray from outside the cornea to the lens and identify the first place its direction changes.
3 · Focus towards the back
After passing through the cornea, light enters through the pupil, the opening in the coloured iris. The iris changes the size of that opening to control how much light enters. Behind it, the transparent lens works with the cornea to bring light towards the retina at the back. Follow the model from front to back and distinguish the pupil opening from the solid lens. In a living eye the lens can change shape to help focus at different distances. This simplified view explains the route and the relationship between the structures, rather than testing accommodation or eyesight. Moorfields Eye Hospital NHS Foundation Trust: What makes up your eye
What to watch: Identify the iris around the pupil opening, the transparent lens behind it and the light-sensitive retina lining the back of the eye.
Why it matters: Controlling light entry and focusing it are different jobs. Together they allow light to reach the sensitive tissue at the back in a useful pattern for the next stage of vision.
Explore this step: Name the opening light passes through, then the transparent structure it reaches next; follow the route to the retina.
4 · Convert at the retina
The retina is the light-sensitive tissue lining the back of the eye. Its photoreceptor cells respond to light and begin converting it into electrical information. Locate the retinal lining, then use the enlarged cell inset to connect the whole-eye view with this smaller-scale event. The inset makes the conversion easier to discuss without suggesting that the cells are that large inside the eye. At this point the lesson changes from the path of light to the path of a nerve signal. The model does not show every retinal cell or all the processing that takes place between them. Oxford University Hospitals NHS Foundation Trust: Tackling vision loss: normal signal pathway
What to watch: Locate the retina on the inner back wall, then connect it with the enlarged photoreceptor inset outside the whole-eye cutaway.
Why it matters: This conversion connects the eye’s optical system with its nervous system. The focused light pattern can now be represented by signals that travel from the retina towards the brain.
Explore this step: Point to where the light pathway ends and explain why the enlarged cells are an inset rather than another organ.
5 · Carry and interpret the signal
Visual information leaves the retina through the optic nerve and travels towards the brain. The brain processes this incoming information so that we can recognise and make sense of what we see. Follow the model’s neural-signal symbol from the back of the eye to the external brain marker, and compare it with the earlier light rays. The symbols represent different processes: a nerve carries signals, not a beam of light or a miniature picture travelling through a tube. The brain marker identifies the destination outside the eyeball; the detailed visual pathways within the brain are beyond this simplified model. Oxford University Hospitals NHS Foundation Trust: Tackling vision loss: normal signal pathway
What to watch: Find where the optic nerve leaves the back of the eye and trace its route towards the separate brain destination marker.
Why it matters: The earlier stages deliver and convert light; this stage carries the resulting information onwards. Vision therefore depends on the retina, its nerve connection and the brain working with the eye’s optical structures.
Explore this step: Compare the light-ray and neural-signal symbols, then explain what travels through the pupil and what travels through the optic nerve.
Read the practice situations and all answer explanations
Sources and how the model is made
The opening images are AI-generated anatomical illustrations. The interactive 3D models and labelled SVG diagrams use original procedural artwork. These teaching images are not medical scans or diagnostic tools. Source references support the learner explanations and do not grant artwork rights.
- Moorfields Eye Hospital NHS Foundation Trust: What makes up your eye — Normal cornea, iris, pupil, lens and posterior eye layout; use anatomy text selectively. No image copied.
- Moorfields Eye Hospital NHS Foundation Trust: Dry eye: the tear film — Blinking spreads the tear film, which lubricates the eye and supports a smooth surface. No treatment instructions copied.
- Guy’s and St Thomas’ NHS Foundation Trust: Corneal abrasion — A scratch/graze of the cornea and the distinction between a superficial injury and complications; no healing-time promise or eye treatment prescribed.
- NHS: Eye injuries — March 2026 guidance: immediate chemical irrigation and emergency help; high-speed/penetrating injury; severe pain or sight changes. Minimum rinsing time is not a clearance test.
- University Hospitals Dorset NHS Foundation Trust: Chemical injury to the eye — Possible surface/anterior-segment damage only. Printed review date November 2023 is overdue; current emergency actions rely on EY-S4, not this leaflet alone.
- HSE: Health risks from welding: arc-eye — Welding radiation can injure the cornea, cause delayed pain and harm other eye structures; no safe viewing time.
- HSE: Using the right type of PPE — Eye protection must match impact, splash, dust or radiation hazards and fit the task/user.
- Oxford University Hospitals NHS Foundation Trust: Tackling vision loss: normal signal pathway — Photoreceptors convert light to electrical signals, carried through the optic nerve to the brain. Research treatment content is not reused.
- NHS Organ Donation: About cornea donation — Injury or disease can leave the cornea cloudy/distorted and affect vision. Source is factual context, not donation advice in this lesson.
- University Hospital Southampton NHS Foundation Trust: Eye emergency department — Chemical injury, penetrating trauma and severe visual symptoms require emergency eye care. Local opening hours/contact instructions are not generalised.
How does ingestion exposure occur at work?
Ingestion exposure usually occurs indirectly through contaminated hands, surfaces, food, drink or poor welfare arrangements.
People rarely intentionally swallow workplace substances, but ingestion is still a realistic route. Dust on hands, contaminated gloves, dirty phones, eating in work areas, vaping, smoking, nail biting and poor welfare can all transfer substances to the mouth.
Hygiene controls are therefore health controls, not just housekeeping. Clean welfare, handwashing, changing facilities and no-food rules in contaminated areas can be as important as air controls.
| Route | Example | Control |
|---|---|---|
| Hand-to-mouth | Lead dust or pesticide residue on hands. | Handwashing before eating, drinking or smoking. HSE good control practice |
| Contaminated food/drink | Open bottle in dusty work area. | No eating/drinking in contaminated areas and clean welfare. HSE good control practice |
| Dirty personal items | Phone or vape contaminated by gloves. | Clean-to-dirty separation and glove removal rules. HSE good control practice |
| Poor cleaning | Settled dust on tables or vehicle cabs. | Vacuum/controlled cleaning and wipe checks. HSE good control practice |
| Facial hair or skin | Dust retained near mouth. | Hygiene, RPE suitability and changing arrangements. HSE good control practice |
When can injection exposure happen?
Injection exposure can occur through sharps, punctures, high-pressure fluids or broken skin. HSE injection alert HSE sharps route
Injection is less common but can be serious. Needlestick injuries may expose people to biological agents. High-pressure injection injuries from hydraulic fluid, paint or grease can look small at the surface but cause deep tissue damage and need immediate medical assessment.
Controls should include avoiding sharps, safe sharps systems, pressure isolation, guarding, maintenance competence and clear escalation after puncture or injection injury.
| Source | Potential harm | Control |
|---|---|---|
| Needlestick | Blood-borne virus exposure. | Sharps systems, training and post-exposure procedure. HSE bloodborne virus routes HSE needlestick overview |
| High-pressure grease | Deep tissue injection injury. | Isolation, pressure release and competent maintenance. HSE hydraulic injection injury alert |
| Hydraulic fluid | Injection injury and chemical exposure. | Depressurise before work and never check leaks by hand. HSE hydraulic injection injury alert |
| Contaminated cut | Infection or chemical entry. | Cover cuts, gloves and first-aid reporting. HSE bloodborne virus routes |
| Broken glass or metal | Puncture and contamination. | Safe disposal and cut-resistant handling. HSE needlestick overview |
How do dose, duration and frequency affect harm?
Dose, duration and frequency influence whether exposure causes acute symptoms, sensitisation or long-term disease.
Dose is not only the amount used. It is the amount that reaches the body. A small quantity sprayed into the breathing zone can create more exposure than a larger quantity used in a closed system. Frequent low-level exposure can be serious where effects accumulate or where sensitisation develops.
Assessments should consider peak exposure, shift exposure, repeated exposure, cumulative dose and vulnerable individuals.
| Factor | Why it matters | Example |
|---|---|---|
| Concentration | Higher concentration can increase harm. | Concentrated acid versus diluted cleaning solution. |
| Duration | Longer exposure increases dose for many substances. | Full-shift sanding versus short repair. |
| Frequency | Repeated exposure can lead to chronic effects. | Daily flour dust exposure causing occupational asthma risk. |
| Peak exposure | Short peaks can cause acute harm. | Opening a vessel or spraying solvent. |
| Control effectiveness | Controls determine how much reaches the body. | LEV position changes actual inhaled dose. |
What is the difference between acute and chronic health effects?
Acute effects occur quickly after exposure, while chronic effects develop over time and may not appear for years.
Acute effects include irritation, chemical burns, dizziness, nausea, breathlessness or eye pain shortly after exposure. Chronic effects may include asthma, dermatitis, cancer, lung disease, nerve damage or reproductive effects after repeated or long-latency exposure.
This difference affects management. Acute hazards need clear emergency response and immediate reporting. Chronic hazards need prevention, monitoring, surveillance, records and long-term review.
| Effect type | Example | Management focus |
|---|---|---|
| Acute local | Acid splash burns skin. | Splash prevention, eyewash/shower and first aid. |
| Acute systemic | Solvent vapour causes dizziness. | Ventilation, exposure control and removal from exposure. |
| Chronic respiratory | Silica exposure causes silicosis over time. | Wet methods, extraction, RPE and health surveillance. |
| Sensitisation | Isocyanates cause occupational asthma. | Strict exposure control and early reporting. |
| Cancer latency | Asbestos exposure causes disease decades later. | Elimination, licensing, records and specialist controls. |
What are local and systemic effects?
Local effects occur where the substance contacts the body, while systemic effects occur after it is absorbed and affects other organs.
A corrosive splash causing a skin burn is a local effect. A solvent absorbed through the lungs and affecting the nervous system is systemic. Some substances can do both: they may irritate the skin and also enter the body.
This distinction helps avoid under-control. Gloves may prevent local dermatitis but not inhalation. Ventilation may reduce inhalation but not contaminated-hand ingestion.
| Effect | Example | Control implication |
|---|---|---|
| Local skin effect | Dermatitis from oils or cleaning agents. | Avoid contact and implement skin care. |
| Local respiratory effect | Irritant gas affects throat and lungs. | Containment, ventilation and emergency response. |
| Systemic nervous effect | Solvent vapour affects alertness or coordination. | Substitution, ventilation and exposure monitoring. |
| Systemic blood effect | Lead affects blood and nervous system. | Specific lead controls and medical surveillance. |
| Mixed effect | Phenol can burn skin and be absorbed. | Prevent contact, emergency response and monitoring. |
Why do target organs matter?
Target organs identify where harm may occur and what surveillance or symptoms may be relevant.
An entry route is how a substance gets into the body; a target organ is where harm may appear. They are not interchangeable. The same task can create inhalation and skin exposure, and one substance can affect several organs. Use the product safety information, the actual exposure and the substance-specific COSHH assessment to decide which controls, monitoring and health surveillance are relevant; do not infer a diagnosis from a symptom or a generic table. HSE COSHH guidance HSE exposure-monitoring guidance.
| Target organ/system | Substance example | Possible evidence route |
|---|---|---|
| Lungs | Silica, asbestos, flour dust, isocyanates and welding fume. | Exposure monitoring, respiratory health surveillance and symptom reporting. HSE welding lung cancer |
| Skin | Cement, epoxy, oils and cleaning chemicals. | Skin checks, glove review and dermatitis reports. HSE evidence HSE evidence |
| Liver/kidneys | Some solvents and metals. | Occupational health advice and exposure reduction. HSE evidence HSE evidence |
| Nervous system | Solvents, lead and some pesticides. | Symptoms, biological monitoring and medical surveillance where applicable. HSE evidence HSE evidence |
| Blood | Lead, benzene and carbon monoxide. | Specific monitoring and medical advice. HSE evidenceHSE: benzene worker exposure case HSE: carbon monoxide mechanism |
| Reproductive system | Lead and reproductive toxicants. | COSHH review, individual assessment and specialist advice. HSE evidence |
Who may be more vulnerable to hazardous substance exposure?
Some people may need additional consideration because of health, age, pregnancy, sensitisation, medication or work pattern.
Vulnerability should be handled carefully and confidentially. The aim is not to exclude people unnecessarily; it is to identify whether exposure could create additional risk and whether adjustments or specialist advice are needed.
Examples include workers with asthma using respiratory sensitisers, pregnant workers exposed to reproductive toxicants, young workers with limited experience, agency workers unfamiliar with controls and workers who have already developed sensitisation.
| Group | Why it matters | Practical response |
|---|---|---|
| New or young workers | May not recognise exposure routes or early symptoms. | Induction, supervision and simple controls. |
| Pregnant workers | Some substances may affect pregnancy or reproductive health. | Individual risk assessment and occupational health advice. |
| Workers with asthma | Respiratory irritants or sensitisers may worsen symptoms. | Control review, health advice and early reporting. |
| Sensitised workers | Very low exposure may trigger symptoms. | Avoid further exposure and use occupational health advice. |
| Contractors | May not know site substances or hygiene rules. | COSHH induction and supervision. |
How should controls be selected by route of exposure?
Separate sharps from pressurised-fluid injection
Task-rated puncture protection for handling sharps does not make touching a pressurised fluid leak safe. Hydraulic, grease and paint injection need source isolation and appropriate physical controls; suspected injection needs immediate professional medical treatment. Sharps exposure requires its own urgent clinical assessment pathway.
HSE: Hydraulic injection injury safety alert · HSE: Needlestick and sharps injuries
Controls should interrupt the route of exposure before the substance reaches the body.
Route-led control selection — part 1 of 2


Read the complete visual as text
- Inhalation: Higher-order controls: Eliminate, substitute, enclose, use LEV and suppress dust. Last-line controls: Suitable residual RPE and exposure-time arrangements; health surveillance is separate health-effect detection, not an exposure barrier. HSE good control HSENI COSHH
- Skin: Higher-order controls: Avoid contact, use closed transfer and splash prevention. Last-line controls: Gloves, coveralls, skin care and washing. HSE good control HSENI COSHH
- Eye: Higher-order controls: Design out splash, use screens and closed systems. Last-line controls: Goggles, face shield and eyewash. HSE good control HSENI COSHH
Route-led control selection — part 2 of 2


Read the complete visual as text
- Ingestion: Higher-order controls: Separate clean/dirty areas and provide welfare. Last-line controls: Handwashing rules and supervision. HSE good control HSENI COSHH
- Injection: Higher-order controls: Eliminate sharps, depressurise systems and guard hazards. Last-line controls: Puncture-resistant gloves and emergency procedure. HSE good control HSENI COSHH
A route-led assessment prevents mismatched controls. Respiratory protective equipment does not protect the skin from wet cement. Gloves do not control solvent vapour. A safety data sheet in a folder does not prevent ingestion from contaminated welfare facilities.
A robust control strategy combines source reduction, engineering controls, safe methods, hygiene, PPE, emergency response, monitoring and health surveillance where needed.
| Route | Higher-order controls | Last-line controls |
|---|---|---|
| Inhalation | Eliminate, substitute, enclose, use LEV and suppress dust. | Suitable residual RPE and exposure-time arrangements; health surveillance is separate health-effect detection, not an exposure barrier. HSE good control HSENI COSHH |
| Skin | Avoid contact, use closed transfer and splash prevention. | Gloves, coveralls, skin care and washing. HSE good control HSENI COSHH |
| Eye | Design out splash, use screens and closed systems. | Goggles, face shield and eyewash. HSE good control HSENI COSHH |
| Ingestion | Separate clean/dirty areas and provide welfare. | Handwashing rules and supervision. HSE good control HSENI COSHH |
| Injection | Eliminate sharps, depressurise systems and guard hazards. | Puncture-resistant gloves and emergency procedure. HSE good control HSENI COSHH |
How can the hierarchy of controls block harmful routes of hazardous-substance exposure?
ERICPD is used here as a planning mnemonic. The linked HSE five-level hierarchy is the official source for the order and relative reliability of controls; the two labels are not identical.
Redesign or substitute before engineered separation; verify the method at the task and stop when a relied-on control fails.
A construction worker opens cement bags and mixes mortar. Dry powder can reach the airways; wet cement can contact and burn skin or splash into eyes; contaminated hands can carry material into welfare. The assessor must trace each relevant route, rather than assume an airborne sample proves skin safety. A needle or high-pressure injection route is not part of this mixing task and should not be forced into its control plan. HSE cement exposure HSENI COSHH
ERICPD is a six-stage planning aid and the HSE hierarchy has five levels. Isolate is usually engineered separation; Control can be physical or administrative; Discipline sustains the selected safeguards and cannot stand in for them. Higher-order options below are tested for the stated task, not silently skipped. HSE five-level hierarchy HSE five-level hierarchy
How can the ERICPD hierarchy of controls block harmful routes of hazardous-substance exposure?

| ERICPD stage | HSE / IOSH level | Exact intervention and harm-chain break | Owner and effectiveness evidence | Failure or stop condition |
|---|---|---|---|---|
| Eliminate HSE five-level hierarchy | Elimination HSE hierarchy | Use pre-cast or delivered ready-formed units so workers do not mix cement powder or handle wet mortar on site. HSE cement exposure | Designer and buyer check strength, dimensions and installation route. | Unit cannot fit or creates a lifting hazard; reassess before claiming elimination. HSE five-level hierarchy |
| Reduce / substitute HSE five-level hierarchy | Substitution HSE hierarchy | Use a suitable lower-dust supplied form and test a lower-chromate or alternative binder only where structural specification permits. HSE cement exposure | Competent designer and COSHH assessor compare strength, skin hazard and product information. | Unproved structural performance prevents accepting the alternative. Do not credit elimination of wet-cement contact: retain suitable contact controls and verify the claimed dust or sensitisation reduction. HSE five-level hierarchy |
| Isolate HSE five-level hierarchy | Engineering control HSE hierarchy | Separate the mixing point from other trades and route dusty bag opening away from clean welfare. HSE cement exposure | Supervisor checks barriers and pedestrian route before delivery. | Dust crosses the zone or contaminated boots enter welfare; stop and clean safely. HSE cement exposure |
| Control: physical HSE five-level hierarchy | Engineering control HSE hierarchy | Use a closed or low-dust mixer, controlled water feed and splash guard so powder and wet cement do not reach lungs, skin or eyes. HSE cement exposure | Maintainer tests cover and water feed; supervisor observes the first mix. | Open dusty discharge or splashes stop mixing. HSE cement exposure |
| Control: method HSE five-level hierarchy | Administrative control HSE hierarchy | Keep clean and dirty tools separate, wash promptly after contact and prohibit contaminated eating areas. HSE cement exposure | Supervisor observes mixing and handwashing; facilities lead verifies water and drying. | No washing, soaked clothing or unknown product stops work. HSE cement exposure |
| PPE HSE five-level hierarchy | PPE HSE hierarchy | Choose cement-resistant gloves, sleeves and eye protection for residual contact; use assessed RPE for remaining powder exposure. HSE cement exposure | Assessor checks compatibility, fit and change frequency; worker inspects condition. | Wet cement inside glove, damaged eye protection or unfit RPE stops exposure. HSE cement exposure |
| Discipline HSE five-level hierarchy | Sustains controls HSE hierarchy | Act on dermatitis reports, spills, failed mixing equipment and hygiene defects without blaming the worker. HSE cement exposure | Manager reviews field checks and competent health-surveillance advice. | Repeat skin symptoms or control failures trigger redesign and review. HSE cement exposure |
How can the ISO 45001 hierarchy of controls block harmful routes of hazardous-substance exposure?

| ESEAP control level | HSE / IOSH level | Exact intervention and harm-chain break | Owner and effectiveness evidence | Failure or stop condition |
|---|---|---|---|---|
| Elimination HSE five-level hierarchy | Elimination HSE hierarchy | Use pre-cast or delivered ready-formed units so workers do not mix cement powder or handle wet mortar on site. HSE cement exposure | Designer and buyer check strength, dimensions and installation route. | Unit cannot fit or creates a lifting hazard; reassess before claiming elimination. HSE five-level hierarchy |
| Substitution HSE five-level hierarchy | Substitution HSE hierarchy | Use a suitable lower-dust supplied form and test a lower-chromate or alternative binder only where structural specification permits. HSE cement exposure | Competent designer and COSHH assessor compare strength, skin hazard and product information. | Unproved structural performance prevents accepting the alternative. Do not credit elimination of wet-cement contact: retain suitable contact controls and verify the claimed dust or sensitisation reduction. HSE five-level hierarchy |
| Engineering controls HSE five-level hierarchy | Engineering control HSE hierarchy | Separate the mixing point from other trades and route dusty bag opening away from clean welfare. HSE cement exposure | Supervisor checks barriers and pedestrian route before delivery. | Dust crosses the zone or contaminated boots enter welfare; stop and clean safely. HSE cement exposure |
| Engineering controls HSE five-level hierarchy | Engineering control HSE hierarchy | Use a closed or low-dust mixer, controlled water feed and splash guard so powder and wet cement do not reach lungs, skin or eyes. HSE cement exposure | Maintainer tests cover and water feed; supervisor observes the first mix. | Open dusty discharge or splashes stop mixing. HSE cement exposure |
| Administrative controls HSE five-level hierarchy | Administrative control HSE hierarchy | Keep clean and dirty tools separate, wash promptly after contact and prohibit contaminated eating areas. HSE cement exposure | Supervisor observes mixing and handwashing; facilities lead verifies water and drying. | No washing, soaked clothing or unknown product stops work. HSE cement exposure |
| PPE HSE five-level hierarchy | PPE HSE hierarchy | Choose cement-resistant gloves, sleeves and eye protection for residual contact; use assessed RPE for remaining powder exposure. HSE cement exposure | Assessor checks compatibility, fit and change frequency; worker inspects condition. | Wet cement inside glove, damaged eye protection or unfit RPE stops exposure. HSE cement exposure |
| Administrative controls HSE five-level hierarchy | Sustains controls HSE hierarchy | Act on dermatitis reports, spills, failed mixing equipment and hygiene defects without blaming the worker. HSE cement exposure | Manager reviews field checks and competent health-surveillance advice. | Repeat skin symptoms or control failures trigger redesign and review. HSE cement exposure |
How should management verify controls for this task?
For cement mixing and route-led control, the management check should start with a real control decision: Suitable residual RPE and exposure-time arrangements; health surveillance is separate health-effect detection, not an exposure barrier. Name the person who will test it, keep evidence from the actual work, and reopen the assessment when the failure condition in the hierarchy table occurs. HSE management-system guidance.
A review should compare the planned control with what workers and supervisors can use in practice. Record the defect, owner, interim protection, verification and next review trigger so that a policy statement or certificate does not stand in for a working control.
How do exposure monitoring and health surveillance fit in?
Monitoring and surveillance check different parts of the same health-risk control system.
Exposure monitoring helps show whether substances are reaching the worker. Health surveillance helps identify early signs of work-related health effects. Neither replaces prevention and control.
A competent review should compare task observation, monitoring results, health surveillance trends, incident reports, RPE use, LEV checks and worker feedback.
| Route/effect | Monitoring option | Health surveillance consideration |
|---|---|---|
| Inhalation dust/fume | Personal air sampling and LEV checks. | Respiratory questionnaire or lung function where justified. HSE monitoring HSENI COSHH |
| Skin exposure | Wipe checks, glove review and observation. | Skin checks for dermatitis or sensitisation. HSE monitoring HSENI COSHH |
| Systemic uptake | Biological monitoring where suitable. | Occupational health interpretation and health records. HSE monitoring HSENI COSHH |
| Eye splash risk | Inspection of splash controls and eyewash. | First-aid and incident trend review. HSE monitoring HSENI COSHH |
| Ingestion risk | Surface/welfare contamination checks. | Hygiene review and worker feedback. HSE monitoring HSENI COSHH |
Which duties apply in Great Britain and Northern Ireland?
Great Britain uses COSHH 2002 and Northern Ireland uses COSHH (NI) 2003; EH40/2005 is also approved for NI use.
Use the current statutory text and regulator guidance for the jurisdiction. COSHH duties and supplier classification are distinct: for chemical supply, GB CLP and NI EU CLP can differ. Lead, asbestos and radioactive substances have separate legal regimes. GB COSHH Regulations 2002 NI COSHH Regulations 2003 HSE COSHH overview HSENI COSHH
| Decision | Great Britain | Northern Ireland |
|---|---|---|
| COSHH duty | GB COSHH 2002 requires assessment, prevention or adequate control, maintenance, monitoring and health surveillance where relevant. GB COSHH Regulations 2002 | NI COSHH 2003 sets its own assessment, prevention or adequate-control and monitoring route. GB COSHH Regulations 2002 NI COSHH Regulations 2003 |
| WELs and air samples | EH40/2005 fourth edition is the current published GB WEL list; compare the right substance, fraction, units and reference period. HSE EH40/2005 | HSENI approves EH40/2005 fourth edition for NI COSHH; apply the NI instrument and regulator route. NI COSHH Regulations 2003 HSENI EH40 approval |
| Limits of a WEL | A below-WEL air result does not establish adequate control of skin or ingestion routes, or override ALARP for carcinogens, mutagens and asthmagens. HSE good control practice | NI COSHH likewise requires adequate control of relevant routes; check NI guidance and the actual product and task. HSE EH40/2005 HSENI COSHH |
How could BuildOut Ltd manage routes of exposure in practice?

BuildOut Ltd would manage routes of exposure by separating dusty, wet, chemical and biological work into task-specific control standards.
In this worked example, BuildOut Ltd carries out refurbishment, concrete cutting, plasterboard work, cement handling, joinery and drainage repairs. The company would not rely on one generic COSHH assessment; it would map how substances enter the body for each work package.
On a concrete-cutting job, BuildOut first tests whether cutting can be avoided or redesigned. If cutting remains, the supervisor checks dust capture or suitable suppression at the point of generation and verifies the worker’s respiratory protection and clean break area. On a separate cement-mixing task, the supervisor also checks wet-cement contact, glove suitability, handwashing and eye protection. Each observation closes a different exposure route; an air sample does not clear wet skin contact. HSE cement guidance HSE exposure-monitoring guidance.
| Management element | How the business would manage it | Evidence to review |
|---|---|---|
| Assessing | Identify inhalation, skin, eye, ingestion and injection routes for each task. | Route-of-exposure matrix and COSHH assessments. |
| Analysing | Compare task frequency, duration, vulnerable workers, controls and monitoring evidence. | Risk register and health surveillance review. |
| Implementing | Use wet methods, extraction, welfare segregation, gloves, goggles, RPE and hygiene controls. | RAMS, equipment checks and briefing records. |
| Checking | Supervisors observe tool use, LEV capture, glove condition, eyewash access and welfare cleanliness. | Inspection forms and defect close-out. |
| Learning | Use dermatitis reports, dust complaints, eyewash use and monitoring results to improve controls. | Incident and health trend review. |
| Improving | Procure lower-dust products, better extraction tools and clearer welfare setups on future projects. | Procurement standard and project close-out learning. |
How does the exposure decision change across sectors?
The same COSHH principles transfer, but the substance, form, route, people and strongest feasible control change with the task.
A sector label alone cannot select a respirator or exposure limit. The supervisor identifies the real task, product and people, then the competent assessor checks the route and control. HSE good control practice HSENI COSHH
| Sector | Task and harm route | Strongest feasible control and check | Residual stop point |
|---|---|---|---|
| Manufacturing | Solvent wipe-down can expose skin and lungs even if air concentration seems low. | Use closed dispensing and non-contact tools; check glove compatibility and skin condition. | Stop on unidentified solvent, leakage or glove breakthrough. HSE construction solvents |
| Construction | Cement mixing creates powder inhalation, wet-cement skin/eye contact and hand-to-mouth transfer. | Use ready-formed units where feasible; otherwise closed mixing, splash control and washing. | Stop on cement inside gloves or absent clean water. HSE cement exposure |
| Hospitality | Frequent wet cleaning and spray disinfectant can affect skin, eyes and airways. | Choose a non-spray method and keep contact off skin; verify drying and product instructions. | Stop when ventilation, product identity or skin protection fails. HSE preventing work-related skin disease |
| Waste logistics | Discarded sharps and contaminated packages can puncture skin or splash an eye. | Segregate suspect waste, use a sharps route and train post-exposure reporting. | Stop handling after a puncture and obtain urgent occupational-health advice. HSE needlestick overview |
How does this topic support NEBOSH Diploma learning?
Learners should be able to explain body systems, routes of entry, dose-response and control decisions based on the route.
A strong DN2 answer connects the substance form to the route of entry and the health effect. For example, dry cutting concrete creates respirable crystalline silica inhalation risk; wet cement creates skin and eye risk; solvents may create inhalation and skin absorption risk.
Good scenario answers should also consider vulnerable groups, health surveillance, exposure monitoring and the limits of relying only on PPE.
| Prompt | Strong answer includes | Common weakness |
|---|---|---|
| Describe exposure routes | Inhalation, skin, eye, ingestion and injection with examples. | Only mentions breathing in. |
| Explain dose-response | Dose, duration, frequency and susceptibility. | Treats all exposure as equal. |
| Recommend controls | Controls matched to the route of entry. | Generic PPE list. |
| Discuss health effects | Acute/chronic, local/systemic and target organs. | Lists symptoms without mechanism. |
What competence is needed for hazardous-substance decisions?
Workers, supervisors, assessors and specialists need different practical demonstrations; attendance alone cannot prove control.
A worker should be able to show the correct method and stop condition. A supervisor should see the control work at the task; a hygienist should explain sample representativeness and uncertainty. A manager should turn the result into a funded action. HSE good control practice HSENI COSHH
| Role | Practical demonstration | Assessor and evidence | Reassess when |
|---|---|---|---|
| Worker | Identify inhalation, skin, eye, ingestion and puncture routes in the actual task. | Supervisor observes mixing, cleaning and hygiene, not just a quiz. | New route, splash, skin symptom or cut. HSE good control practice |
| Supervisor | Check that the chosen method prevents powder release and wet-cement contact; verify washing. | Manager samples work and defect closure. | Barrier breach or no washing provision. HSE cement exposure |
| COSHH assessor | Map each route, affected body system and vulnerable person; reject air-only evidence for skin safety. | Competent adviser peer-checks route matrix. | Product/form changes or health signal. HSE good control practice |
| Occupational-health professional | Advise on symptoms, surveillance and post-exposure route within clinical competence. | Risk owner acts on anonymised recommendation and preserves confidentiality. | Dermatitis, breathing symptoms or sharps exposure. HSE needlestick overview HSE COSHH overview |
| Buyer and designer | Choose pre-formed units or closed supply and verify that a new lifting or contact risk is controlled. | Technical lead signs trial and field observation. | Changed binder, product or installation route. HSE cement exposure |
What warning signs show routes of exposure are misunderstood?
Warning signs include controls that protect one route while leaving another route open.
When a route is missed, pause the exposed task and trace the transfer path: dust into breathing air, wet cement through gloves, contamination from hand to mouth, or splash to the eyes. Correct the failed source or pathway control, check welfare and emergency arrangements, brief the workers and observe the restarted task. RPE cannot compensate for uncontrolled skin contact, and a clean air result alone cannot establish that skin exposure is controlled. HSE COSHH guidance HSE skin-exposure guidance HSE exposure-monitoring guidance.
| Warning sign | How harm can develop | Action |
|---|---|---|
| RPE issued but skin contact ignored | Dermatitis, burns or absorption can continue. | Review gloves, hygiene and contact prevention. HSE COSHH overview |
| Gloves worn all day | Sweating, contamination and dermatitis may worsen. | Select correct gloves and change schedule. HSE COSHH overview |
| Eating near dusty work | Ingestion route becomes credible. | Provide clean welfare and enforce no-food areas. HSE COSHH overview |
| No eyewash near splash tasks | Eye injury worsens during delayed response. | Install and maintain eyewash. HSE COSHH overview |
| No task observation | Real routes such as blowback or hand-to-mouth transfer are missed. | Observe the task and consult workers. HSE COSHH overview |
| Health symptoms dismissed | Early disease signs may be missed. | Use occupational health advice and review exposure. HSE COSHH overview |
Chemical hazard symbols: what do they mean?
Exploding bomb
Explosive, self-reactive or organic peroxide hazards.
Flame
Flammable, self-heating or pyrophoric substances.
Flame over circle
Oxidising substances that can intensify fire.
Gas cylinder
Gas under pressure.
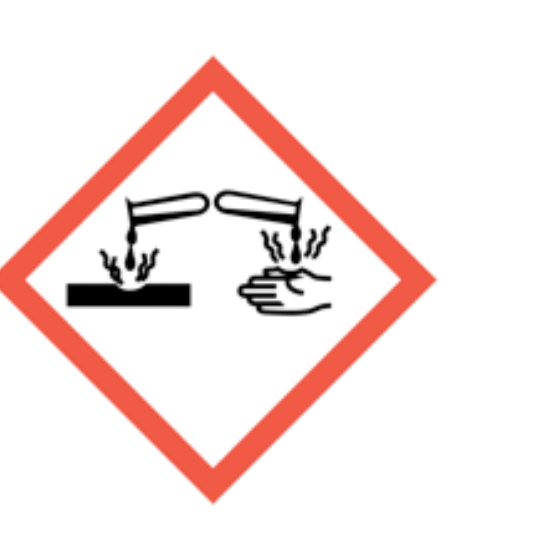
Corrosion
Skin burns, eye damage or corrosive to metals.
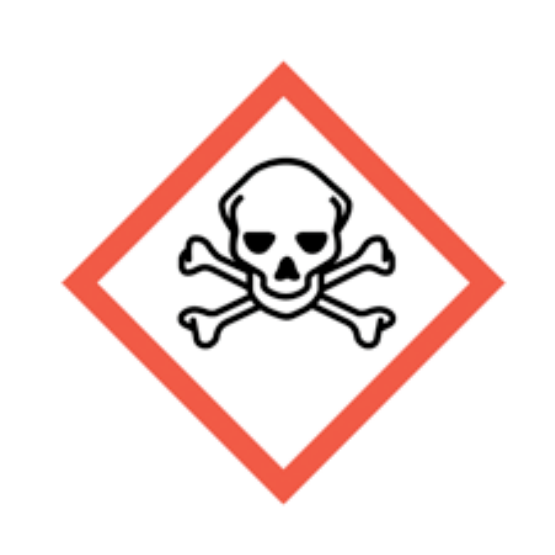
Skull and crossbones
Acute toxicity.
Exclamation mark
Irritation, harmful effects or skin sensitisation; some classifications cover drowsiness, dizziness or ozone-layer hazard. Read the actual hazard statements. Skin sensitisation differs from respiratory sensitisation.
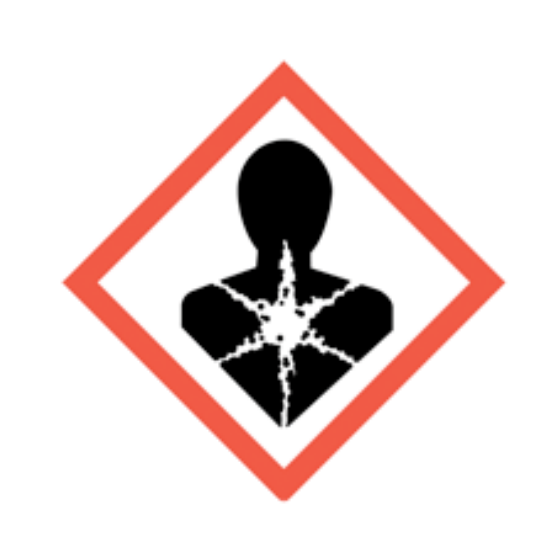
Health hazard
Serious health hazards, including organ damage, aspiration hazard, respiratory sensitisation, cancer and reproductive effects; some can follow a single exposure.
Environment
Hazardous to the aquatic environment.
What do the acronyms and key terms mean?
Acronyms should be understood before they are used in assessments, briefings, audits or learning answers.
| Acronym | Meaning | Plain-English use |
|---|---|---|
| COSHH | Control of Substances Hazardous to Health | The UK regulations for preventing or controlling hazardous substance exposure. |
| WEL | Workplace exposure limit | An airborne exposure limit listed in EH40. |
| LEV | Local exhaust ventilation | Engineering control for capturing airborne contaminants. |
| RPE | Respiratory protective equipment | Equipment worn to reduce inhalation exposure. |
| PPE | Personal protective equipment | Equipment worn to reduce remaining exposure risk. |
| TWA | Time-weighted average | Exposure average adjusted for time. |
| STEL | Short-term exposure limit | Short reference period exposure limit where specified. |
Unlock another resource
You have used this month’s two free downloads. Publish a post in your own words to unlock one more resource, or choose SHARE Individual for 10 downloads per month.
You decide whether to share. If you do, use the relevant platform disclosure tools and do not make claims you do not genuinely hold.